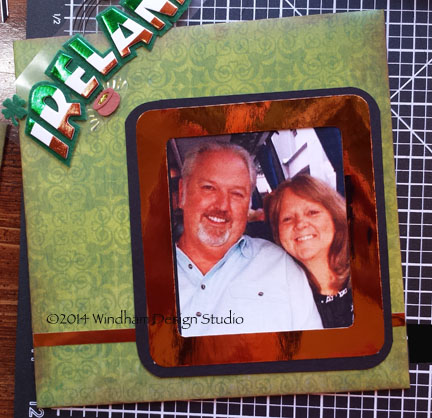
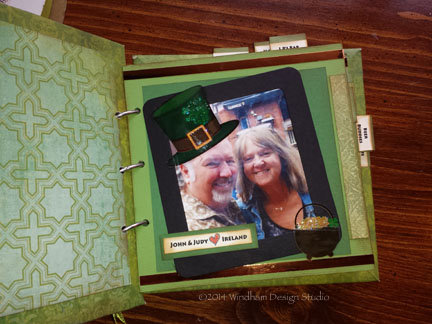
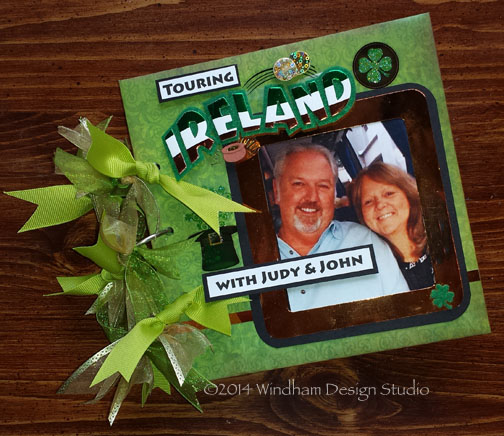
There’s nothing like a once-in-a-lifetime adventure. You plan for months, sometimes years, then go on the trip of your dreams where you learn the local customs, visit the tourist places, enjoy the foods the area is famous for and take pictures. Lots of pictures. Lots and lots of pictures. You’ll need several albums just to contain your prints. My friends Judy and John took one of those trips this past summer to Ireland. They posted photos on Facebook so we could enjoy the Irish Isles vicariously, and I was so glad they did. I copied the photos straight from Facebook to make a small photo album for them, but this is more than a photo album. This is a DIY album. Although it only has five double-sided pages and holds only ten photos, there are tags for them to record their memories and a special envelope in the back to hold all those photos they took – on a CD. I want this album to last forever and stand up to the handling I know it will have, so I chose Kool Tak™ adhesives and embellishments to make sure my work will be around for a long time. The pages are assembled with Kool Tak™ Premium Extreme adhesive, the Kool Tak™ Shiny Foil Transfer Sheets are added with Kool Tak™ Punch Adhesive and the photos are attached with Kool Tak™ Artist Tape which is removable, so Judy & John can change out the photos for some others from their cameras if they so choose. Here’s how I did it: Supplies

With Kool Tak™ products, I am assured that my hard work will be around for a long time.
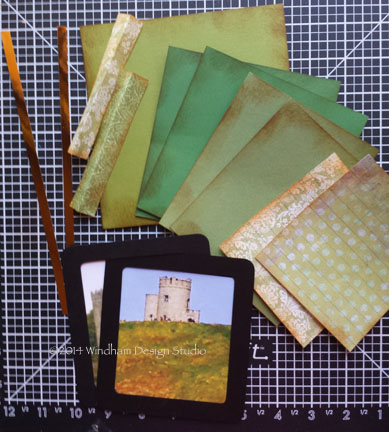
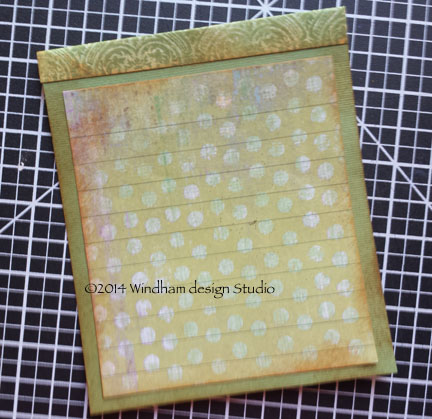
Kool Tak™ Products Kool Tak™ Premium Extreme Adhesive, 1/2″ and 1/8″ Kool Tak™ Punch Adhesive Kool Tak™ Artist Tape, 1/2″, white Kool Tak™ Shiny Foil Transfer Sheets, Mardi Gras Kool Tak™ Foam, Decoupage 3D Design, 1/2″ x 1/2″ x 1/8″ Chipboard, four pieces 7″ x 7″ and 5 pieces 6″ x 6″, plus scrap to cut bookplate Solid card stock, assorted greens, 12″ x 12″ in the following cuts:
- Five pieces, 6″ x 12″
- Ten Pieces, 5″ x 5″
- Ten Pieces, 4 1/4″ x 5″
- Scraps to punch 10 1″ x 2″ labels for tabs
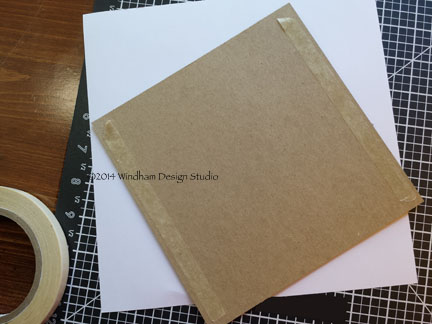
Cream card stock, 8 1/2″ x 11″ Printed paper or card stock, assorted patterns to match solid card stock, about 5 sheets and at least two different patterns Metallic Card Stock (Colorbok), 20 strips, 6″ x 1/4″ and one, 1/4″ x 7 Black Card Stock, eleven 5″ x 5″ pieces for frames Frame Die or frames cut with craft knife, ruler and corner rounder punch Embellishments, Stickabilities, 3 assorted packs (Paper Studio) Brown Dye Ink (Vintage Photo & Rusty Hinge, Tim Holtz Distress Ink, Ranger) Circle Punches, 1 1/4″ and 1/2″ Label Punch, 1″ x 2″ Sizzix Big Shot Sizzix Movers an Shapers L Die – Tag & Bookplates Notebook rings, three 2″rings Computer-generated labels Ribbon, assorted colors and textures (I used a gold 2″ wired organdy, a regular 1″ green organdy and a 1″ green grosgrain.) You’ll need about a yard of each. Tools: Scissors, Craft Knife, Metal Ruler, Cropadile Directions Note: I always ink all the edges of my papers on any project that I want to have a vintage feel. I used Tim Holtz’ Distress Inks, Vintage Photo and Rusty Hinge, throughout the book. Making the Book Covers Note: There are five steps for each cover base. You will need to do steps 1-5 twice to have two complete cover bases.  1. Apply two pieces of Kool Tak™ Premium Extreme 1/2″adhesive to the back of one piece of 7″ x 7″ chipboard and adhere a second piece of chipboard to it. This will make your covers very sturdy.
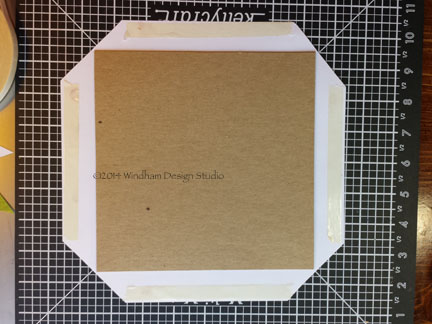
  2. Apply 1/2″ Kool Tak™ Premium Extreme Adhesive around the edges of the chipboard and center it on the back of the cover paper/card stock.
3. Cut the corner sat a 45° angle, leaving approximately 1/16″ of cover paper from the corner of the chipboard. If you cut right up to the chipboard, you’ll have gaps when you make your folds. Apply 1/2″ Kool Tak™ Premium Extreme Adhesive to the edges of the cover paper/card stock.
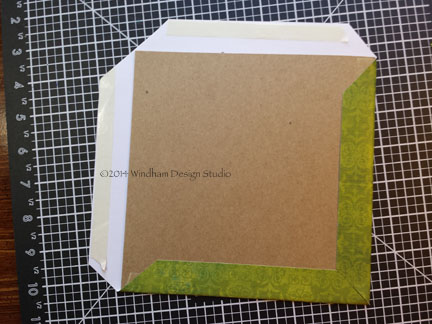
4. Remove the release paper, fold the edges up and seal the cover paper/card stock to the inside of the cover.
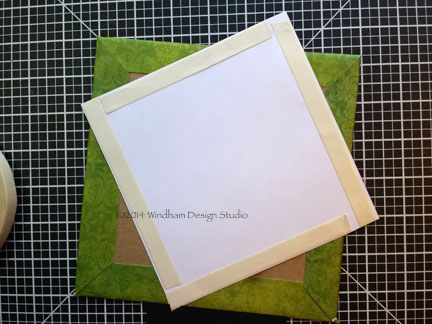
5. Apply 1/2″ Kool Tak™ Premium Extreme Adhesive to the edges of liner paper. Remove release paper and center on cover inside.
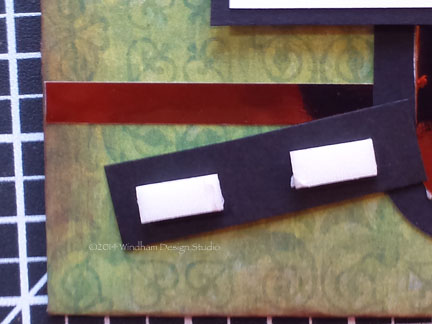
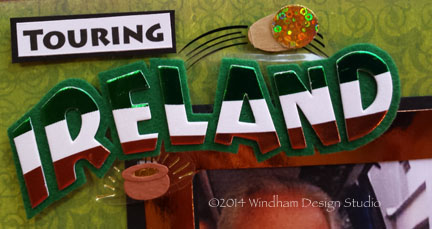
6. Apply once strip of the copper metallic paper along the lower edge of the cover with 1/4″ Kool Tak™ Premium Extreme Adhesive. Cut a frame from copper metallic paper. Cut a second frame from black paper, 1/4″ larger all around than the copper frame. Attach frames together with 1/2″ Kool Tak™ Premium Extreme Adhesive. Apply 1/2″ Kool Tak™ Premium Extreme Adhesive to the back, remove the release paper and adhere it to the font cover.
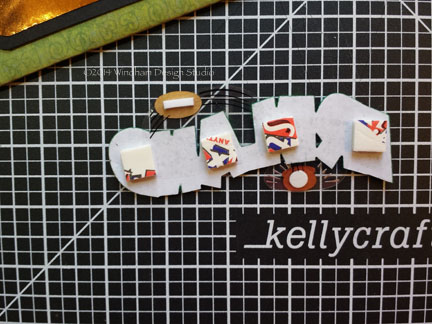
7. The Paper Studio embellishments have foam adhesive on the back of each, but knowing this book could be handled a lot, I preferred to add additional 1/2″ x 1/2″ x 1/8″ Kool Tak™ Foam 3D Decoupage Design pads to many of the pieces, cutting them as needed to fit. I added four additional pieces to the page title.
8. I printed the additional pieces for the book on cream card stock, mounted them on black card stock scraps with 1/2″ Kool Tak™ Pemium Extreme adhesive and added Kool Tak™ Foam 3D Decoupage Design pads to the backs before adding them to the cover front.
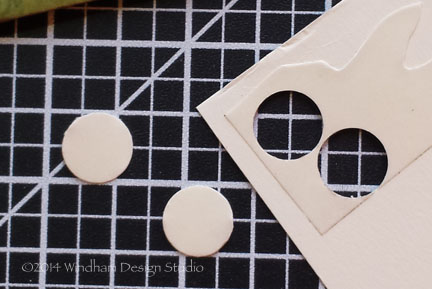
9. Apply a scrap of Kool Tak™ Punch Adhesive to both sides of a scrap of cream card stock and punch two 1/2″ circles.
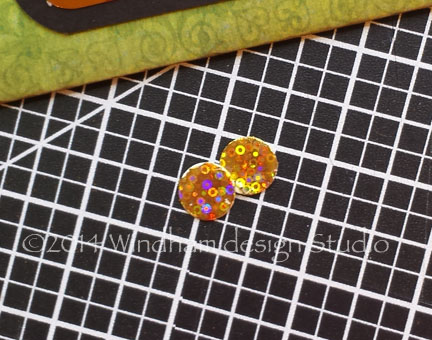
10. Remove the release paper from one side and press the sticky side of the circles to the back of a gold Kool Tak™ Shiny Foil Transfer Sheet.
11. Peel off the circles and apply them to the title block, covering the original coin. Add any additional embellishments if desired and set covers aside.
Inside Pages
For each inner page you will need:
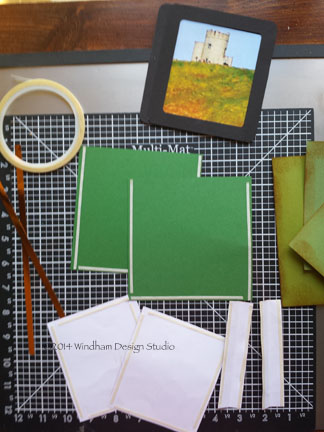
- One 6″ x 6″ piece of chipboard
- One 6″ x 12″ piece of solid card stock, folded to 6″ x 6″ (or two 6″ x 6″ pieces).
- Two 5″ x 5″ pieces of solid card stock
- Two 4 1/4″ x 5″ pieces of solid card stock
- Two 1″ x 2″ labels punched from solid card stock
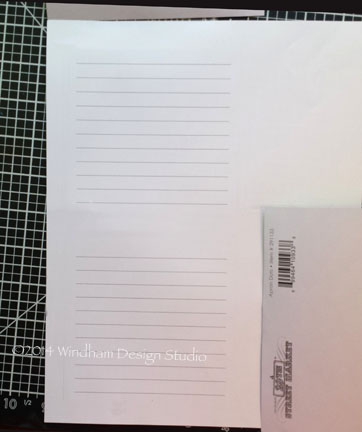
- Two 4″ x 4 3/4″ pieces of printed paper; Optional: Computer-printed journaling lines printed on patterned paper
- Two 4″ x 1″ pieces of printed paper
- Two frames cut from black card stock
- Four 6″ x 1/4″ pieces of copper metallic paper
- Two photos to fit inside frames
- Computer-printed labels cut from cream card stock
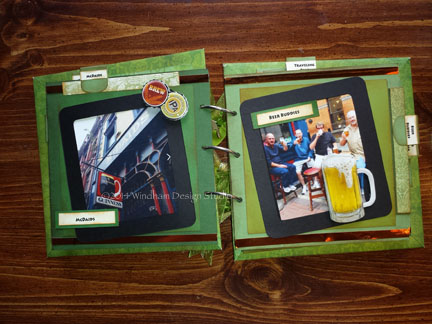
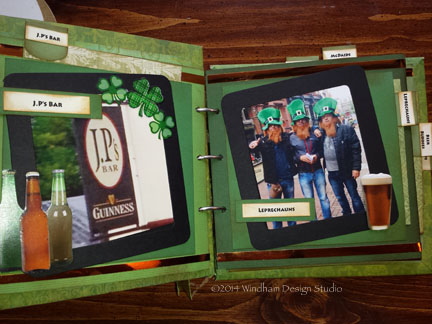
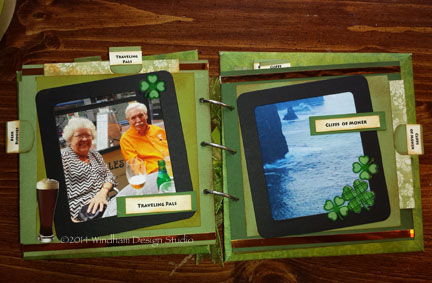
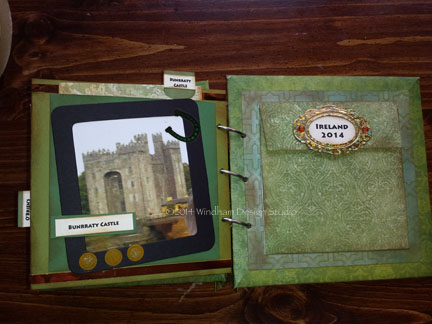
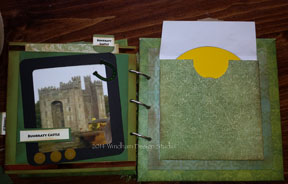
Note: a photo of teach two-page spread is located at the bottom of this post.
Begin by covering the chip board with the 6″ x 12″ card stock and securing it with 1/2″Kool Tak™ Premium Extreme along each edge. Be sure you have the folded edge on the right when working on the front of the page and on the left when working on the back. Apply the metallic copper strips with 1/8″ Kool Tak™ Premium Extreme, 3/8″ from the top and bottom of each page.
Pockets: Apply 1/8″ Kool Tak™ Premium Extreme as close to the edge as possible along three sides of the 5″ x 5″ card stock. Apply one to the page front, centering with the open edge to the right and the other to the page back with the open edge to the top.
Tag Inserts
Trim the journaling block to 4″ x 4 3/4″. Adhere it each of the 4 1/4″ x 5″ pieces of solid card stock with 1/2″ Kool Tak™ Premium Extreme, centering it side-to-side and the same width showing at the bottom of the tag at the bottom. Fold the 1″ x 4 1/4″ piece of patterned paper and attach it to the tag top with 1/8″ Kool Tak™ Premium Extreme. Insert the tags into the pockets.
Note: The tabs will be added after the book is assembled.
Photo Frames
Cut the photo frames from black card stock. I used a discontinued Sizzix die, but you can also cut the frames with a craft knife and use a corner rounder punch to get the same effect. Add the photo with1/2″ Kool Tak™ Artists Tape, which is removable) securing it at the top so that it can be changed out if necessary. Be sure the photo edges leave about 1/4″ of the frame showing on the back after you add the photo. Place 1/8″ Kool Tak™ Premium Extreme adhesive on the right, left and bottom of the frame edge and attach it to the front of the page pocket.
Labels
On each page, trim out the computer-generated labels and mount them on black card stock. Attach them to the pages with 1/2″ Kool Tak™ Premium Extreme adhesive.
Computer-generated Labels
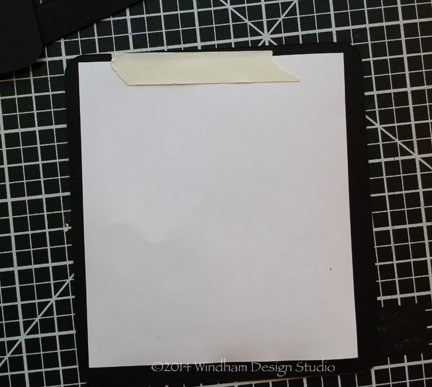
Print out the
journaling blocks pdf file. Attach printed paper to the print-out with adhesive tape along the top edge of the top and along the right edge of the bottom piece. Place this piece back into your printer and re-print. The journaling lines will be on your printed paper, ready to trim.
Embellishments
Embellish as desired with Paper Studio Stickabilities.
Assembly
Covers: Using the Cropadile, punch holes using the larger hole punch, at 2″, 3 1/2″ and 5″ from the top and 1/2″ in from the edge.
Pages: Making sure the tags are all to the right on the front and to the top on the back, punch holes at 1 1/4″, 2 3/4″ and 4 1/4″ from the top and 3/8″ in from the edge.
Binding: Open the notebook rings and thread them through the holes on the back cover with the inside back face up. Add each each page individually on the rings working from the back of the book to the front. Add the cover and close the rings. The inside pages will not be centered on the covers, but there will be room to add the tabs and balance the book pages visually.
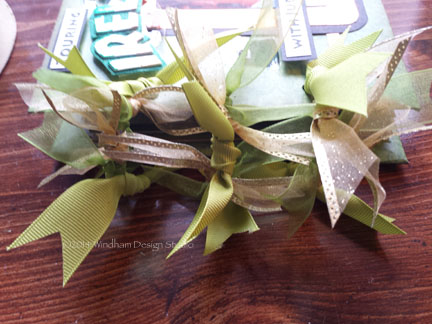
Tie six pieces of ribbon on each ring and finish each with a fish tail cut.
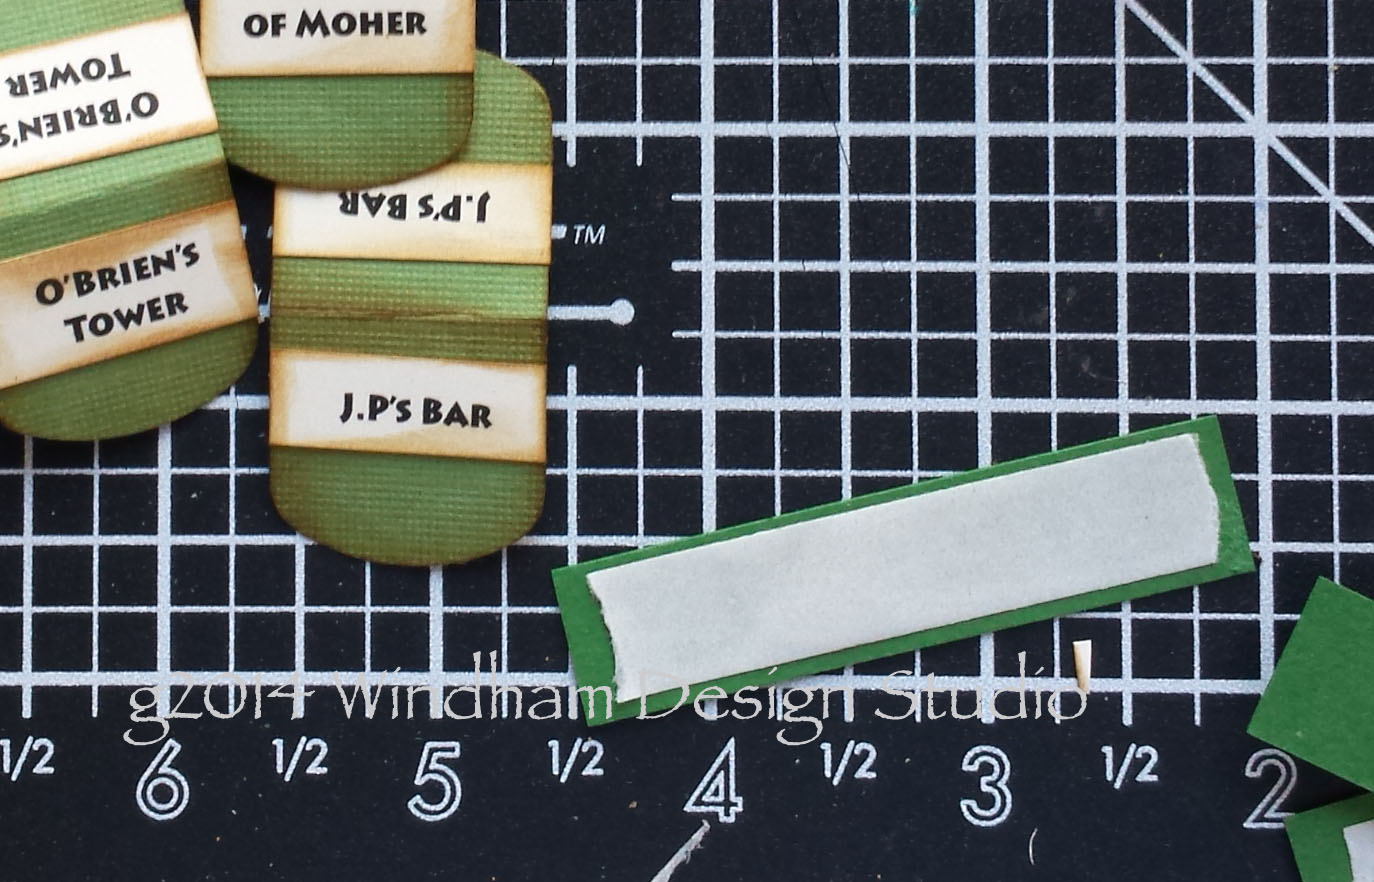
Tabs: Fold the tabs in half to a 1″ square. Trim the computer-generated tab labels and attach to the front and back of each 1″ x 2″ tab using 1/8″ Kool Tak™ Premium Extreme adhesive, about 1/8″ from the center line on each side. Place a strip of 1/2″ Kool Tak™ Premium Extreme adhesive centered on the back of the 2″ side of the tab. Remove the release paper and apply the tabs to the tag inserts, being sure they extend out from the tag about1/2″. Space them apart so that they can be read from the front without moving a page. Place the tabs for the front page in the right opening pocket and for the back of the page in the top opening pocket.
Inside Back Cover
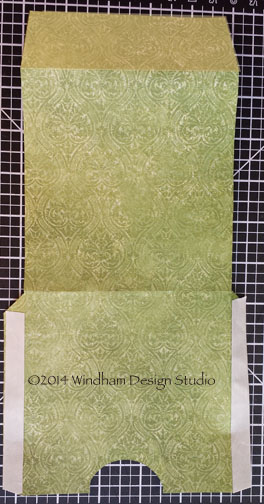
Using the
CD Envelope Template pdf file, cut the template for the cd envelope from paper or card stock. Trim away the side edges above the angle cuts and fold along the dotted lines. Punch a 1 1/4″ circle in the bottom center of the sheet. Apply 1/2″ Kool Tak™ Premium Extreme adhesive to the edges below the angled cuts. Fold the edges in toward the center of the envelope, remove the release paper and adhere the edges along the sides of the pocket. Fold the top flap down and adhere the envelope to the inside back cover with 1/2″ Kool Tak™ Premium Extreme adhesive.
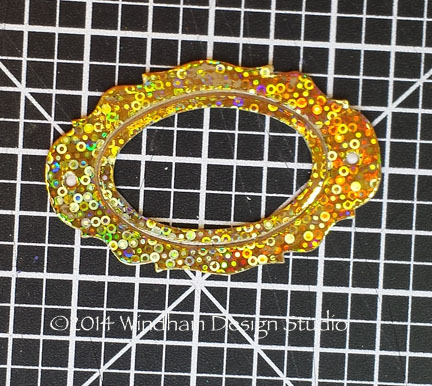
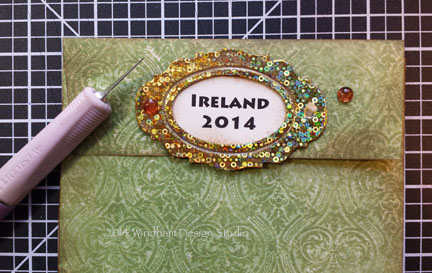
Apply Kool Tak™ Punch Adhesive a scrap of chipboard and cut out a bookplate using the Sizzix Tag and bookplates die. Remove the release paper and place the bookplate face-down on the back of the gold Kool Tak™ Shiny Foil Transfer Sheet. Remove the foil sheet to reveal the transfer.
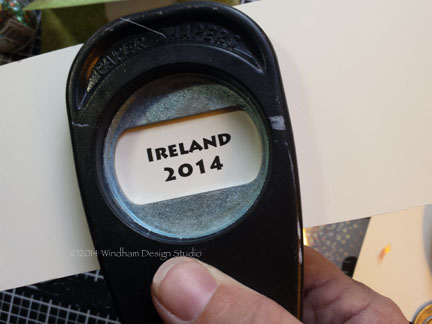
Punch out a computer-generated label and attach it in the bookplate, using 1/8″ Kool Tak™ Premium Extreme adhesive. Add brads or the embellishment of your choice in the bookplate holes.
Apply 1/2″ Kool Tak™ Premium Extreme adhesive to the back of the bookplate and adhere it to the envelope flap.
Add embellishments as desired on each page of your book.
Tip: If you think you’ll want to make more cd envelopes in the future, print the pdf file on a piece of 11 ” x 14″ paper (legal size), adhere it to a piece of chipboard and trim it out. This will make creating these quick and easy.
I know this seems long, but a lot of it is just repetitive work. Once you’ve made one page, the rest will go very quickly.
I was going to wait to give this to my friends at Christmas, but I can’t wait to surprise them. It’s always a nice surprise to get a gift when you least expect it!
Pages
The envelope will hold a standard cd.


 1. Apply two pieces of Kool Tak™ Premium Extreme 1/2″adhesive to the back of one piece of 7″ x 7″ chipboard and adhere a second piece of chipboard to it. This will make your covers very sturdy.
 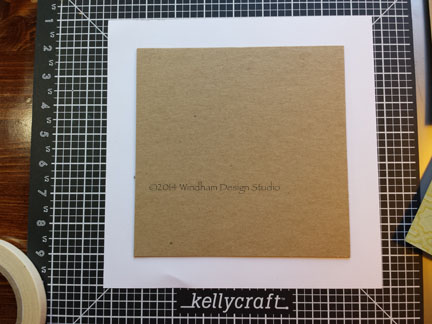 2. Apply 1/2″ Kool Tak™ Premium Extreme Adhesive around the edges of the chipboard and center it on the back of the cover paper/card stock.