
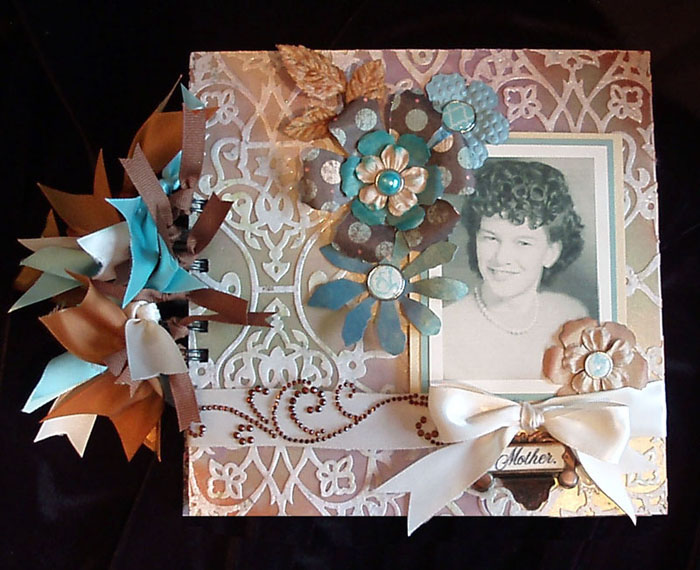

In honor of Mothers Day, I decided to make a little album with Kool Tak Adhesive Sheets and some of my favorite memories of my mother: the stylish fashionista way she dressed, her wacky sense of humor and her caring heart. I wanted this album to be very special with lots of stories and reflect her style, which was very feminine. I think I may have nailed it, at least as far as the cover is concerned.
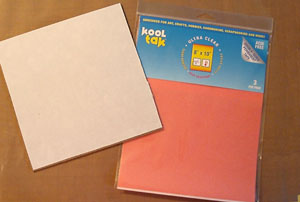
This album could not have been made without Kool Tak Adhesive Sheets. They come in 8″x 10″ sheets, three to a package. I chose 8″ x 8″ Zutter Chipboard Wood Covers, and used the 8″x 2″ excess from the adhesive on the remainder of the project so here was no waste whatsoever.
Here’s how I did it:
Supplies
- Kool Tak™ Non Stick Crafting Sheet
- Kool Tak™ Ultra Clear Adhesive Sheets, trimmed to 8″ x 8″ (2)
- Kool Tak™ Strips
- Kool Tak™ 3D Foam Pads, white, 1/4″ x 1/4″ x 1/16″ thick
- Chipboard wood covers, 8″ x 8″, (2)
- White gesso
- Sponge or brush
- Die cut lace paper, 8″ x 8″, (2)
- Patterned paper, 8″ x 8″ (2)
- Clear embossing ink
- Clear embossing powder
- Assorted patterned paper scraps, minimum 4″ x 4″ (6-8)
- Label holder (Graphic 45)
- Mica powders: green, blue, purple, yellow, rose
- Large dry brush
- Ribbon, 18″ each of three colors of 1″satin, 18″ of 1/4″ grosgrain, 24″ of 1″ ivory satin
- Brads
- Photo
- Colored scrap card stock, 1/4″ larger all around than the photo
- Tattered Florals die (Sizzix)
- Big Shot Machine (Sizzix)
- Sentiment stamped or printed on ink jet printer
- Rhinestone swirls
- Fabric leaves
- Assorted colors of card stock, 7 3/4″ x 7 3/4″, (24 sheets)
Tools: scissors, craft knife, heat tool, Bind-it-all punch and “O” wires (or similar binding system), dry sweeping/dusting sheet
Instructions:
1. Lay down the Kool Tak™ Non Stick Crafting Sheet on your work surface. Apply two light coats of white gesso to the edges, front and back of the covers using a small sponge or brush. It doesn’t matter if it covers completely. You just need a light background for the mica powder.
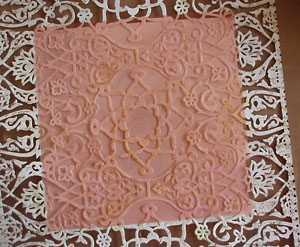
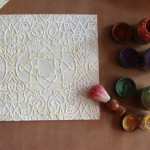
2. Cover the lace paper with clear embossing ink. Apply clear embossing powder and then heat the embossing powder with the heat tool until the powder melts.
3. Apply the 8″ x 8″ Kool Tak™ Ultra Clear Adhesive sheet to the gessoed side of the front cover. Remove the release paper, center the lace paper on the cover, replace the release paper on top of the lace paper and then smooth the lace paper onto the cover. Flip the cover over and trim along each edge with the craft knife.
Remove the release sheet from the Ultra Clear Adhesive, apply lace paper and cover with the release sheet. Press to secure the lace paper onto the book cover.
4. Dust the powders over the entire cover using the dry brush. Remove the excess powder from the book covers and the Crafting Sheet with the dry sweeping/dusting sheet.
5. Repeat for the back cover. Cover inside of both covers with coordinating patterned paper, using Kool Tak™ Strips.
6. Layer the photo onto two pieces of scrap card stock. Attach the photo to the cover, using some of the leftover Kool Tak™ Ultra Clear Adhesive Sheets rather than a large glue dot. Simply cut a strip 1/2″ wide and approximately 5″ long. Peel the release paper back and roll the adhesive strip to a 1/2″ x 1/4″ square. Use four pieces to attach the photo to the book cover.
7. Die cut flowers from coordinating scrap paper and roll the edges of the die cut flowers downward. Layer the flowers in assorted sizes and use a decorative brad to secure the flowers together. Attach with Kool Tak™ 3D Foam Pads.
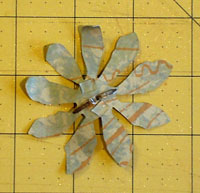
Place the 3D Foam Pads on either side of the brad shank to balance the attachment.
8. Punch the binding holes on covers and pages, line up the inside sheets with the covers and bind the book with O wires.
9. Tie the 24″ of ivory satin around the front cover and tie in a bow. Attach the word “Mother” to the label holder with a scrap of Kool Tak™ Ultra Clear Adhesive Sheets, add decorative brads and adhere to the book cover with more adhesive sheet scraps. Apply decorative rhinestone swirl to ribbon.
10. Finish your book off with 6″ pieces of 1″ ribbon tied onto the O wires. Add the 1/4″ grosgrain to the front side of the binding.
I can hardly wait to finish the inside of this book. I know my mother would be proud and I’ll leave a wonderful memory for my descendants.
Candice this project is just beautiful! Love the lace paper…
Thank for the inspiration, Candice. Now I want to make an album with mom’s wacky photos!
Hugs,
Carmen L