
It’s hard to believe that the holidays are already here. It seems as though we just put away last year’s decorations, and It’s time to get them out again.
Get a jump start on your holiday memories by creating this photo album ahead of time. Kool Tak™ products will help your preserve your memories and keep them in good shape for years to come.
Here’s how I made it:
Supplies
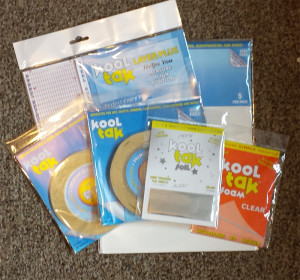 Kool Tak™ Products
Kool Tak™ Premium Extreme, 1/2″ and 1/4″
Kool Tak™ Punch Adhesive Sheet, 8″ x 10″
Kool Tak™ Foil, Silver
Kool Tak™ Layer Plus Tool
Kool Tak™ Clear Foam Squares, 1/4″ x 1/4″
Little B Card Stock, 6″ x 12″ book
Little B Number Die
Spellbinders Dies (borders and window)
Sizzix Dies (small reindeer and small snowflakes)
Die-cutting machine
Christmas card stock 8″ x 8″ Slab (Graphic 45)
Colorbox Dye Ink, Mudslide (Clearsnap)
Zutter Bind-it-all and Red O Wires
Wax paper
Instructions
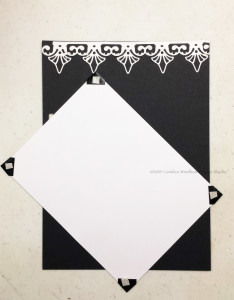
Cut four pieces of Little B card stock to 6″ x 8″. Adhere two sets of two sheets with Kool Tak™ Premium Extreme 1/2″ Adhesive to make the cover bases. Cut four different patterns, two pieces each, of Christmas Graphic 45 card stock: Two patterns cut to 6″ x 8″ and two patterns cut to 5″ x 7 1/4″. Cut four pieces of Little B white card stock to 5 1/4″ x 7 1/2″. Lightly sponge all edges with the Mudslide Dye Ink.
Adhere the 6″ x 8″ card stock to the front and back of the chip board covers using Kool Tak™ Premium Extreme 1/2″ Adhesive.
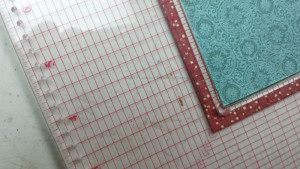
Use the Kool Tak™ Layer Plus Tool to line up the white card stock 1/2″ from the binding edge and 1/4″ on the remaining edges on front and back covers. Adhere the card stock using Kool Tak™ Premium Extreme 1/2″ Adhesive. Add the remaining Graphic 45 card stock, centering it on the white card stock.
Note: If you like, you can skip the additional layers on the inside covers and back cover.

Tip: When using dies with small pieces, place a piece of wax paper between the die and the cutting material to make removing it easily without pieces being stuck in your die. Be sure to remove the wax paper layer before adhering it to your project, but the wax paper layer can also be used for another project.
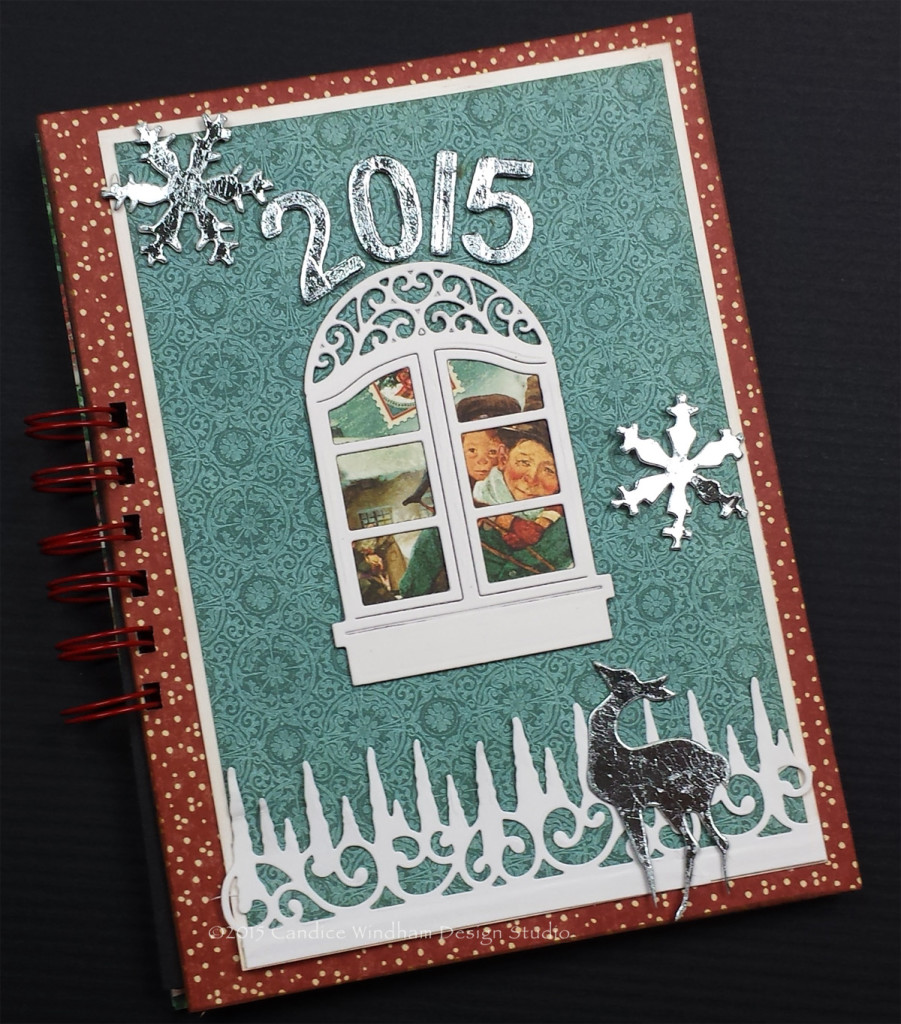
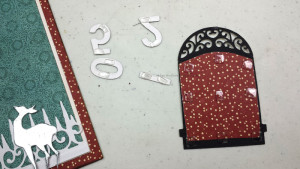
Apply enough Kool Tak™ Premium Punch Adhesive to scraps of Little B white cardstock and cut the reindeer , snowflakes, window, icicle border (two pieces) and numbers. Remove the release paper from the icicle border and place it on the front cover, upside down and to the far left side of the layer, to indicate snowy trees. Trim and add the second piece to the right side where the reindeer will be to hide the addition. Set the window aside for the next step. Remove the release papers from the remaining die cuts and apply Kool Tak™ Silver foil.
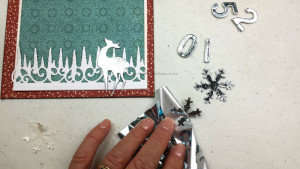
Cut the Tiny Tim image from Graphic 45 paper and attach it to the back of the window die cut with 1/4″ Kool Tak™ Premium Extreme. Apply Kool Tak™ 1/4″ Clear Foam to the window back as well as the foiled die cuts ( cut smaller pieces for the window arch) and use the Kool Tak™ Layer Plus Tool to align the window to the page. Arrange the numbers in an arch above the window and add snowflakes.
For the inside pages, die cut a different border, applying Kool Tak™ Punch Adhesive to white cardstock before cutting. Place a piece of this trim along the top of each page.
I have never seen a photo corner that stays put over time with the original adhesive, so I always add a small piece of Kool Tak™ 1/4″ Premium Extreme Adhesive to each corner before placing my photos in my books.
Bind your book with the Zutter Bind-it-all and O wires.
Now, just take your photos, print them out and your holiday album will be complete.
Tip: If you want to add journaling, just create tags a little smaller than your photos, add a tab on one side and slip them behind your photos.