
I have this thing about clutter. I don’t like knick-knacks, little groupings on a tabletop (unless they are all related vintage items and/or a part of family history), masses of framed photos, etc. That doesn’t mean I don’t have some of those areas in my home. I do, in moderation. I’m just not always crazy about them, mostly because they are dust collectors, and I would much rather be creating than dusting.
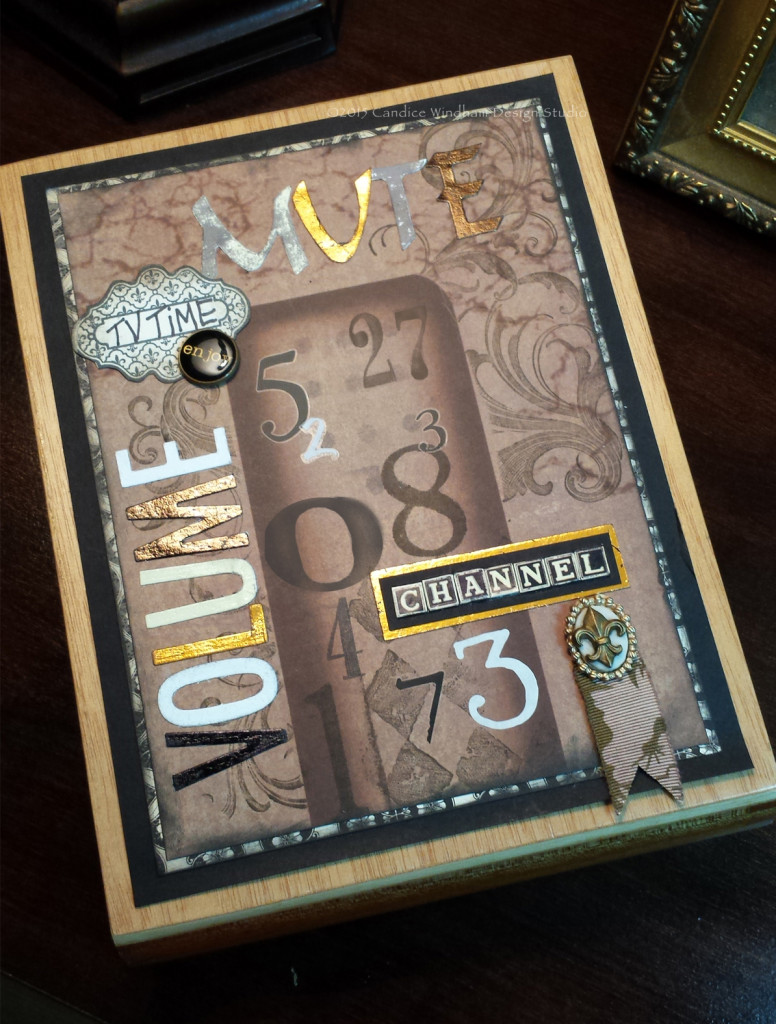
In my mind, everything has a place and everything is in it’s own place (Thank you, Mrs. Coker, eighth-grade home economics maven.) That’s why I created this box to corral TV clutter, all the things you absolutely must have to enjoy an evening of television in peace: a remote control, extra batteries and a TV Guide. That makes a few less dust collectors lying around.
Using Kool Tak™ Premium Extreme to assemble this box cover, Kool Tak™ Reusable Non-stick Crafty Mat, Kool Tak™ Pick’n Place Sticky but Non-sticky Pencil to keep things neat and orderly, and Kool Tak™ Punch Adhesive and Kool Tak™ Foils to decorate it just makes it quick, easy and durable.
Here’s how I made it:
Supplies
Kool Tak™ Products:
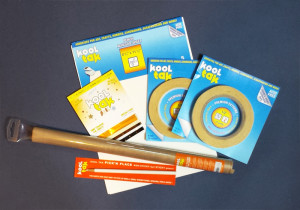
- Kool Tak™ Premium Extreme Adhesive, ½”
- Kool Tak™ Premium Extreme Adhesive, ¼”
- Kool Tak™ Reusable Non-stick Crafty Mat
- Kool Tak™ Pick’n Place Sticky but Non-sticky Pencil
- Kool Tak™ Punch Adhesive, 4” x 6“ sheets
- Kool Tak™ Foil Sheets, Earthtones
Note: Paper sizes are designed to fit a 9 ½” x 7” box. Adjust your trim sizes to fit your box.
- Wooden Cigar Box, approximately 9 ½” x 7”
- Patterned paper or cardstock, 8” x 6 ¼” and two sheets 8 ½” x 6 ½”
- Black cardstock, 8 ½” x 6 ¾”
- TV Themed pdf file
- Tim Holtz Distressables, numbers (Ranger)
- Cardstock scraps, black, brown and white,
- Dies, letters (Quickutz)
- Die Cutting Machine (Spellbinders Grande Calibur)
- Numbers: stamps, rub-ons and stickers, assorted sizes, fonts, neutral colors
- Felt to fit box bottom
- Goof Off Cleaner
- Large Swirl stamp (Hero Arts) and Harlequin Stamp (Stampin’Up!®)
- Dye Inks, Brown and Black
- Tools: paper towels, paper trimmer, craft knife, pencil with an unused eraser
Instructions
- Apply Goof Off to paper towel and rub any customs stamps from the sides of the box (the box top will be covered with paper).
- Apply the patterned paper to the cardstock using ½” Kool Tak™ Premium Extreme Adhesive to create the layer base for the box top. Print the pdf file onto patterned paper and trim it ¼” smaller on all sides than the inside of the layered paper. Print an additional copy of the pdf file, trim out the remote control image in the center and use it as a mask on the patterned paper. Stamp the large swirl stamp with brown dye ink. Remove the mask and use the pencil eraser to stamp black dots to indicate buttons on the remote.
Tip: Ink the eraser, stamp it onto a scrap piece of paper and then stamp the finished page to get a lighter print.
- Attach this sheet to the box top layers and all to the box lid using ½” Kool Tak™ Premium Extreme Adhesive.
- Apply Kool Tak™ Punch Adhesive to both sides of the cardstock scraps, cut out the words VOLUME and MUTE, remove the release paper and apply foils to each letter.
Tips:
1. To save money, cut the cardstock scraps a little larger than your dies before wrapping them with Kool TakTM Punch Adhesive, rather than trying to cut several at once from the same sheet.
2. Try to match the cardstock to the foil color, i.e., black for darker foils, white for lighter foils. You’ll have less chance of any tiny missed areas. Of course, you can always press the cardstock to the foils to fill in any large spots.
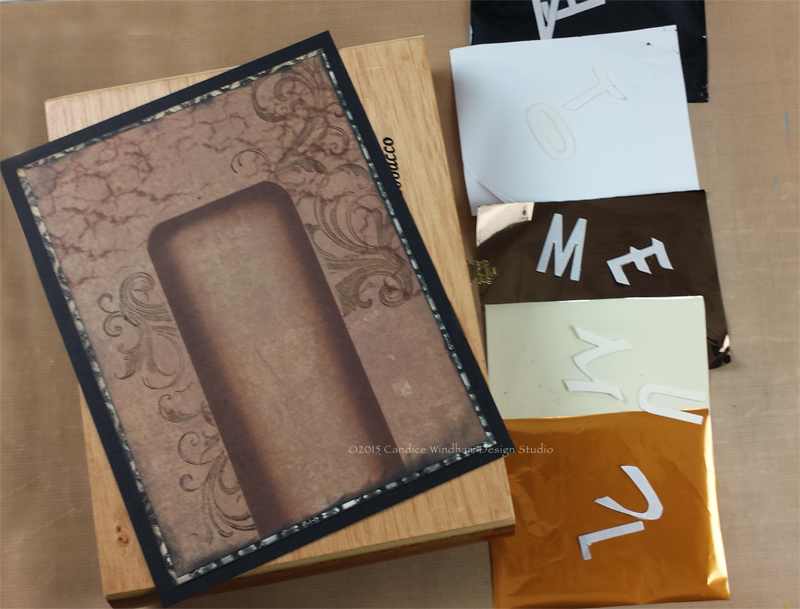
Remove the release paper from the cardstock backs an apply the letters to the front of the pdf print.
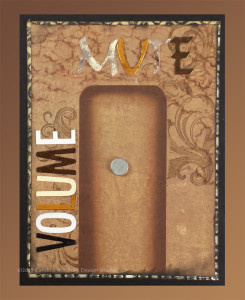
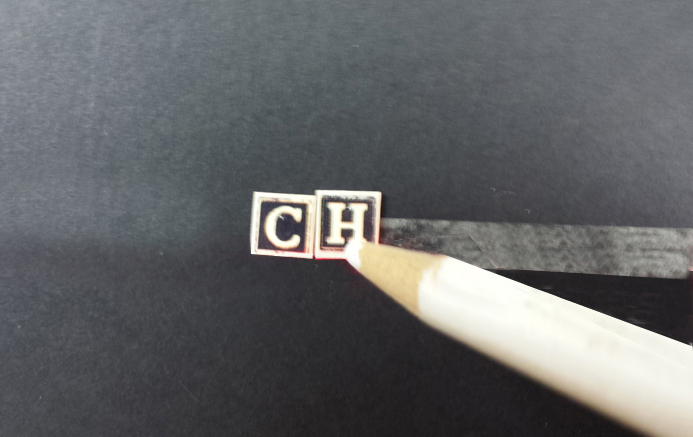
Use the stickers, stamps and rub-ons to add numbers in various sizes and shades to the remote control area of the pdf. file. Place a strip of Kool Tak™ ¼” Premium Extreme on back cardstock and arrange the Distressable letters to make the word CHANNEL, using the Kool Tak™ Pick’n Place Pencil to easily place the tiny letters. Trim the cardstock to leave a 1/8” border all around the letters. Cut a larger cardstock scrap, ¼” all around than the CHANNEL piece, cover with Kool Tak™ Punch Adhesive and add Kool Tak™ Copper Foil. Layer the Channel piece onto the copper piece, attaching with Kool Tak™ Premium Extreme and attach the scrap to the box top near the remote control image, again with Kool Tak™ Premium Extreme . Add additional embellishments if you wish.
Cut the remaining patterned cardstock to fit the inside top and bottom of the box and attach them using ½” Kool TakTM Premium Extreme Adhesive. Attach felt to the box bottom with ½” Premium Extreme Adhesive.
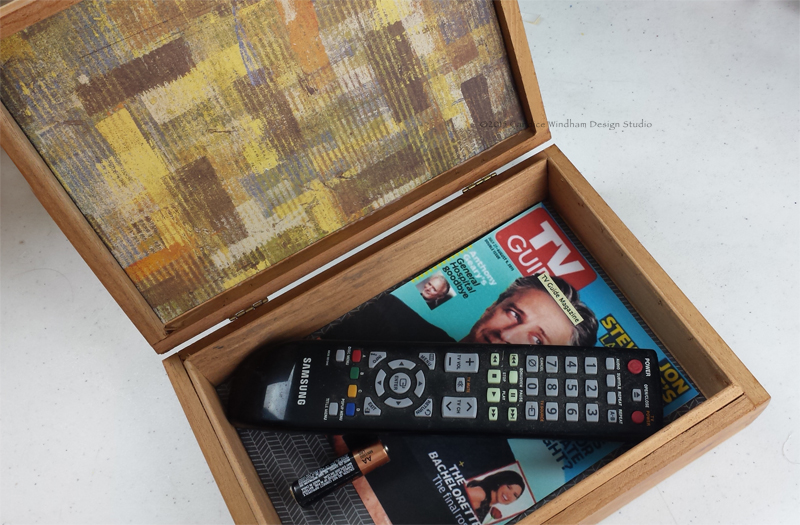
Place your lovely box on a coffee or end table, sit back and await the compliments.