

If you’re looking for a project to make with a child, here’s a fun one! When I was little, my aunts taught me how to make these little boxes out of wooden popsicle sticks and once I knew how – there was no stopping me. I remember making them for all my teachers who would use them to store small items such as rubber bands and thumb tacks. I’ve updated these boxes to include glints of color from pretty Kool Tak foils. Little hands will love stacking the sticks and adding the foil while you apply the Kool Tak glue. Nowadays you can easily find packages of these wooden sticks at the craft supply store so you don’t really have to eat a ton of cold treats to make these trinket boxes – although I won’t tell if you do!
Here’s how:
Materials:
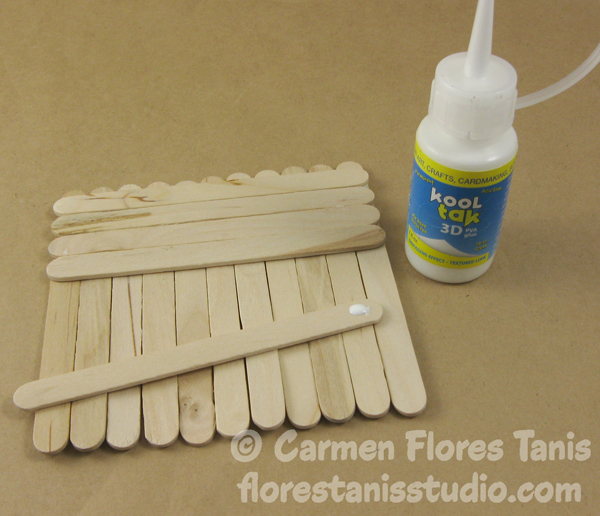
Kool Tak™ 3D Adhesive Foam Pads – round 3/8” diameter x 1/16” thick
Kool Tak™ 3D PVA glue with fine tip
Kool Tak™ Shiny Transfer Foil Sheets – assorted colors
Wood craft / popsicle sticks
Craft foam sheets – greens, pinks
Tools:
Needle tool, scissors, die cut machine with dies – butterflies and leaves
Instructions:
1. Line up enough craft sticks to make a square then glue another layer of sticks crosswise using Kool Tak™ 3D PVA glue. This will become the base of the box.
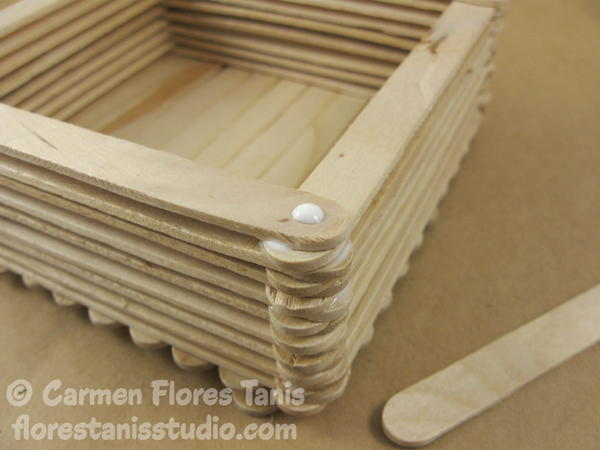
2. Add a drop of glue to the four corners of the wood base and place two sticks on opposite sides. Continue to glue and stack craft sticks alternating sides until you reach the height you like.
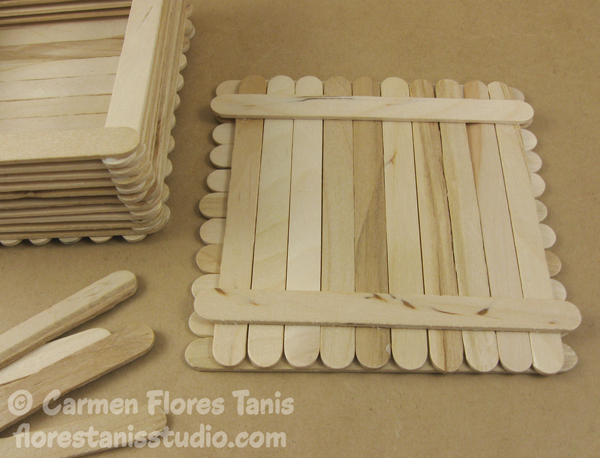
3. To make the lid of the box, stack and glue two layers of sticks just as you did for the base. Add two extra sticks crosswise. This will be the underside of the lid and the two sticks will help the lid to fit snugly onto the top of the box.
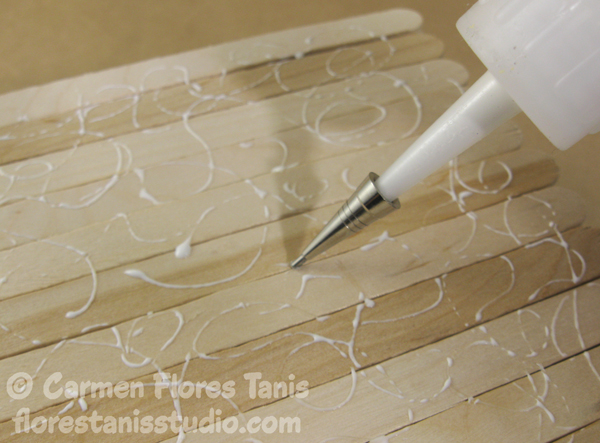
4. Attach the fine tip to the bottle of Kool Tak™ 3D PVA glue. Squeeze the bottle gently to draw squiggles on the box lid. Let the glue dry until it turns clear.
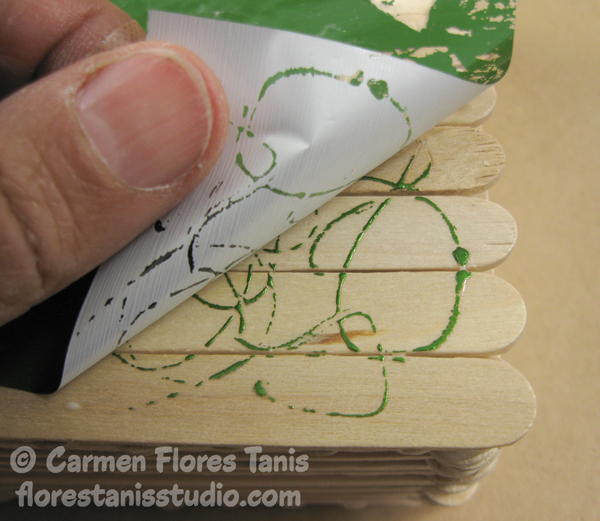
5. The Kool Tak™ Shiny Transfer Foil Sheets are each basically a clear plastic release sheet with a dull side and a shiny side. Select a green foil sheet and press it shiny side up / dull side down onto the adhesive on the box lid and rub well. Lift and peel off the foil sheet to reveal 3D detailing. The clear plastic release sheet lifts off leaving the shiny foil adhered to the box lid. (**Tip – You can use every little bit of the foil transfer sheet until all you have left is the clear release sheet.)
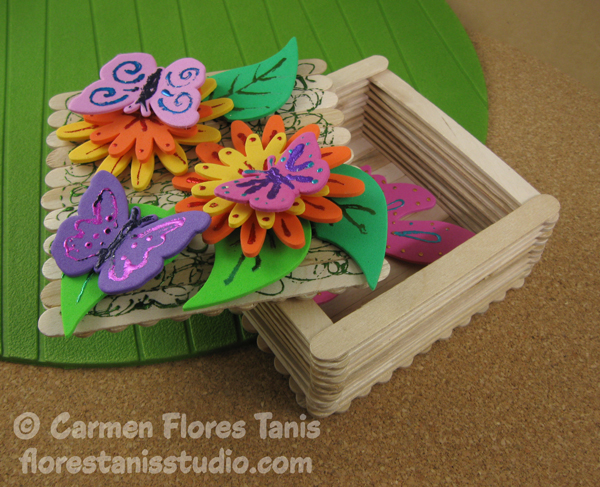
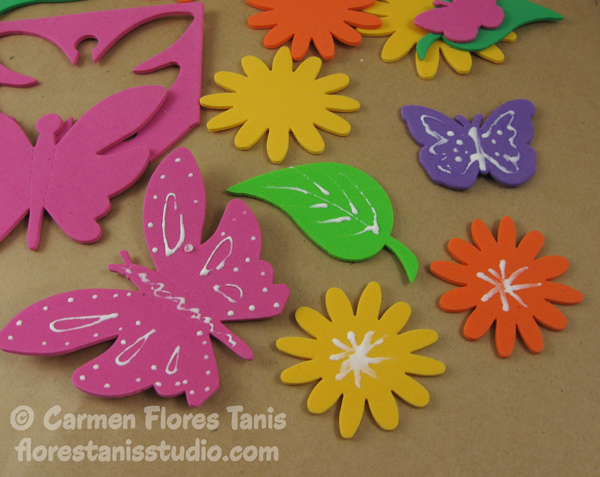
6. Use the die cut machine to cut butterflies and leaf shapes from the sheets of craft foam. Add details to the foam shapes with Kool Tak™ 3D PVA glue. Let the glue dry until it turns clear. Add foil to each foam shape.
7. Decorate the box lid by attaching the craft foam shapes with adhesive foam pads.
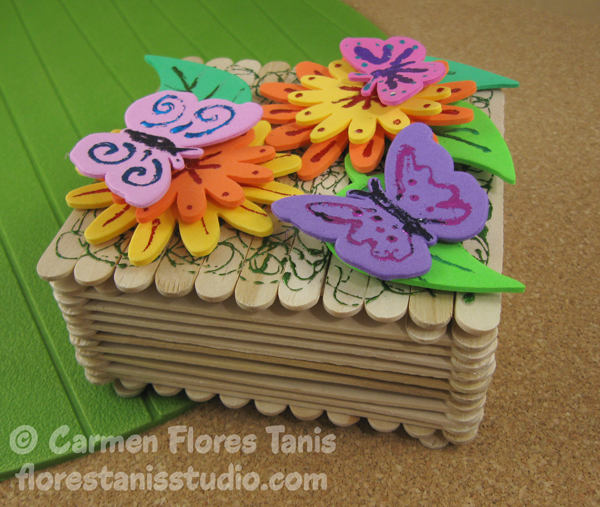
If you don’t have a die cut machine, you can use scissors to cut fun shapes from the craft foam sheets. You can completely change the look of this box by varying the choice of foil colors and foam shapes. Now you and your young helper will have a place to keep all your springtime treasures!