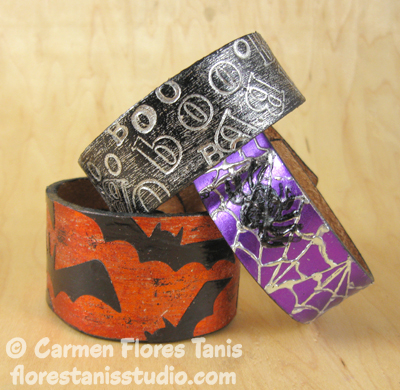

One of my favorite ways to wear my art is on my wrist! I love to make little works of art using blank leather wristbands because then I can enjoy them and be fashionable at the same time. And with Halloween just around the corner, here’s a trio of wristbands decorated with the bright colors and shine of Kool Tak™ foils. I used a different technique for each wristband and the foils worked beautifully on them all. With these wristbands, you can dress up for Halloween all month long!
Materials:
Kool Tak™ Clear Adhesive Sheets- 8” x 10”
Kool Tak™ 3D PVA glue with fine tip
Kool Tak™ Shiny Transfer Foil Sheets – “Carnival”, “Holiday”, “Vintage” packs
Leather wristband blanks – one 1 1/2” and two 1” in width (available at leather stores and here)
Tools:
Scissors, black permanent marker, paint brush, acrylic sealer (I used Liquitex Gloss Varnish), die cut machine with bat die, metal leather alphabet stamps & hammer (available at leather supply shops and here), snaps & setter (if your leather wristband blanks don’t have them attached already), needle or piercing tool
Instructions:
Orange Bat Wristband
**(Note – I used leather wristband blanks that came without the snaps attached. This makes it a little easier to work with but if yours has snaps already, don’t worry – just work around the snaps.)
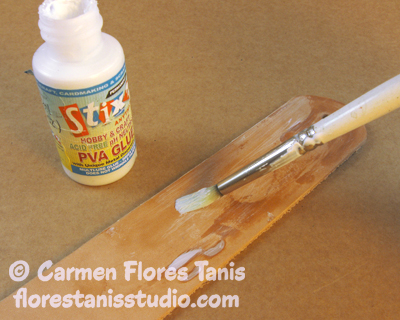
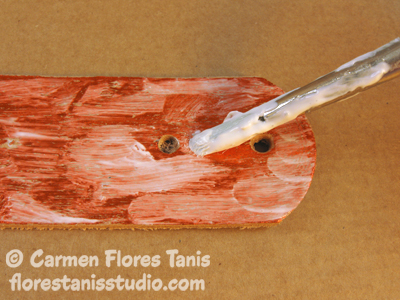
1. Brush a coat of Kool Tak™ 3D PVA glue on the front side of the 1 1/2” wide leather wristband. The wet glue is white, so wait a few minutes until it turns clear and tacky. (The reason to wait until the glue turns clear is that if you try to apply the foil while the glue is still wet, the glue will come off the wristband and stick to the foil sheet instead of the foil sticking to the wristband.)
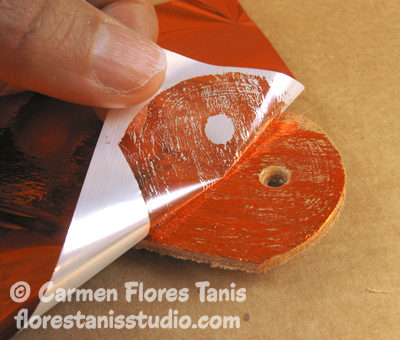
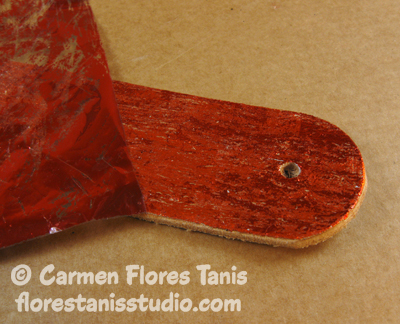
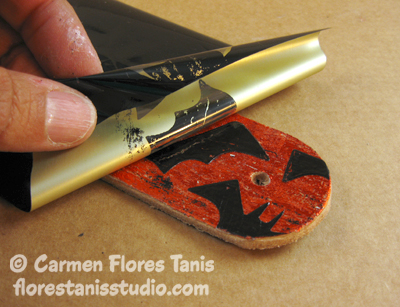
2. The shiny transfer foil sheet is basically a clear plastic release sheet with a dull side and a shiny side. The foil packages of shiny transfer foil sheets come as an assortment of various cool colored solids and patterns. Select an orange foil sheet and press it shiny side up / dull side down onto the glue and rub well.
Lift and peel off the foil sheet. The clear plastic release sheet lifts off leaving the shiny foil adhered to the wristband. Depending on the grain of the leather wristband, you may end up with areas where the foil did not adhere. Just brush on another coat of glue, let dry until clear and then continue to add foil until you are happy with the coverage.
And don’t throw away the foil sheet! You can use every little bit of the foil on it until all you have left is the clear release sheet. *Tip – the glue will start to dry on the brush as you work, so wash your brush out with water every ten minutes or so to keep it nice and flexible.
3. Lightly brush on one more coat of glue, let dry then apply a sheet of darker orange foil. This will add a really pretty mottled effect. I love how the 3D PVA glue dries clear and does not dull down the foil!
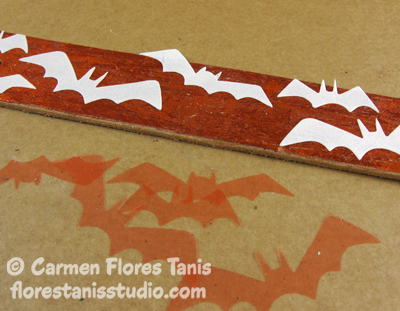
4. Cut bat shapes from a Kool Tak™ Clear Adhesive Sheet using the die cutter and bat die.

5. Peel the pink plastic release liner from the bats to expose the adhesive and place them all over the wristband. You can place bats over the edges to add interest and then just trim the overhanging parts with scissors.
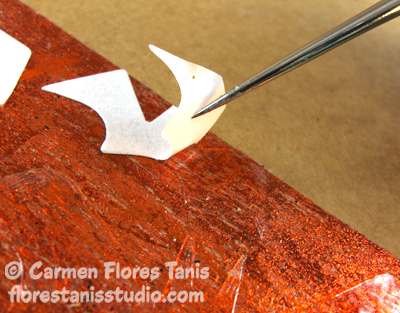
6. Use a needle tool to remove the white release papers from the bat shapes and expose the adhesive.
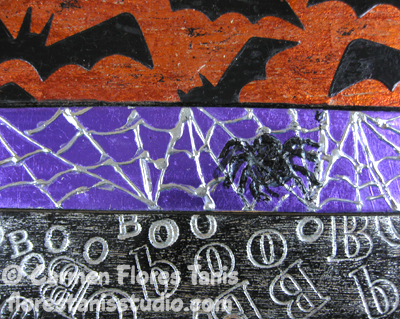
7. Place a sheet of black foil, dull side down, onto the sticky bats and rub well. Lift and peel off the foil sheet to see all those shiny black bats!
Continue to apply black foil until all the bats are foiled.
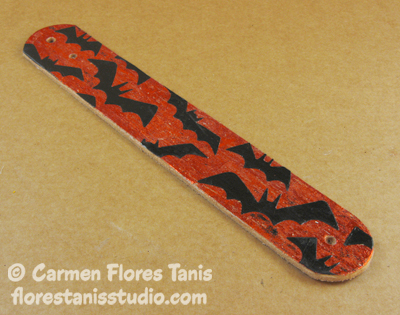
8. To add a little more of a distressed look, very very lightly brush on one more coat of 3D PVA glue, let dry and then apply the black foil. This tones down the orange foil and adds a pretty antiqued look. Set aside the wristband for now.
Black Boo Wristband
9. Brush a coat of Kool Tak™ 3D PVA glue on the front side of a 1” wide leather wristband. Let dry until clear then apply a silver foil sheet the same way as before, adding more glue and foiling until the wristband has a nice even silver layer.
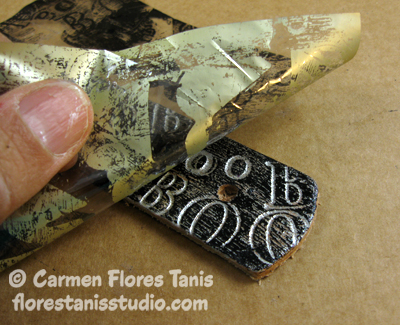
10. Using the leather stamping tools, stamp the word “Boo” all over the wristband.
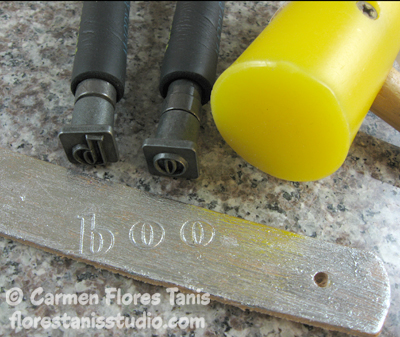
Use different sized stamps for a fun look.
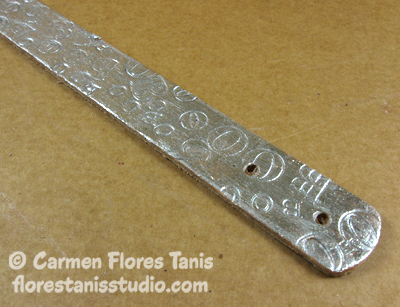
11. Brush a coat of Kool Tak™ 3D PVA glue on top of the silver foil. Try to avoid using a heavy coat because you don’t want the glue to get into the stamped impressions on the leather. Apply black foil. This is a cool effect – the stamped letters will stay silver while the top turns black! Set the wristband aside when you’re done foiling.
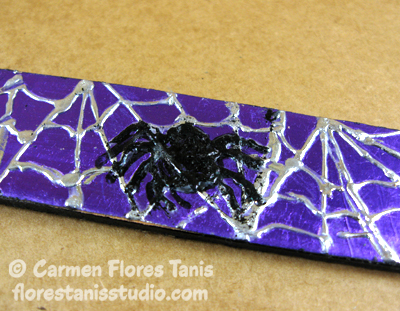
Purple Spider Web Wristband
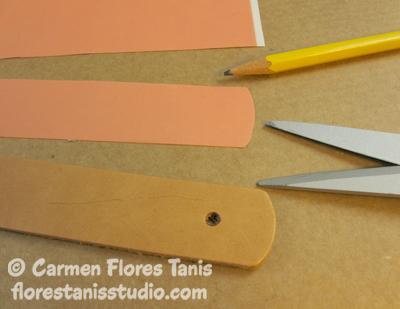
12. Trace a 1″ wristband on the white release paper side of a Kool Tak™ Clear Adhesive Sheet. Cut out with scissors.
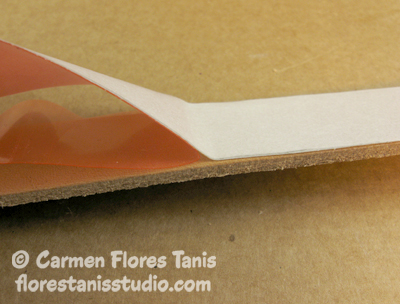
13. Peel the pink release liner up on one end of the adhesive sheet to expose the adhesive. Press the adhesive down onto the wristband and continue peeling and pressing until the entire adhesive sheet is applied.
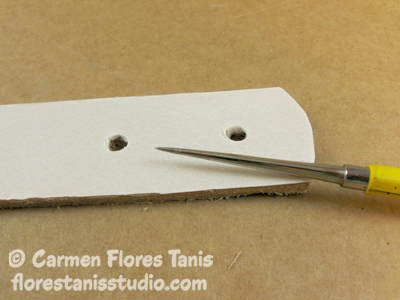
14. If you covered up the holes in the wristband where the snaps go, poke them in the adhesive sheet with the needle tool.
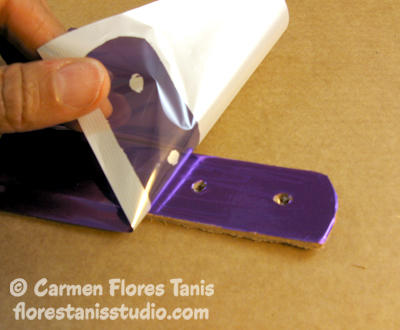
15. Peel the white release paper from the adhesive sheet to expose the adhesive. Apply a purple foil sheet, rub well and peel off. You’ll notice that the foil has a much smoother and shinier look when you use the adhesive sheets. Cool huh?!
16. Fit the fine tip on the 3D PVA glue bottle. Squeeze the bottle gently as you draw straight lines on the purple foil.
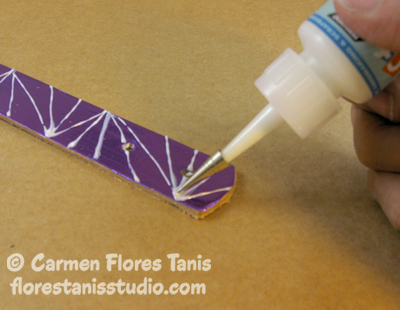
17. Draw scalloped lines in between the straight lines to make spiderwebs. Let the glue dry until it turns clear.
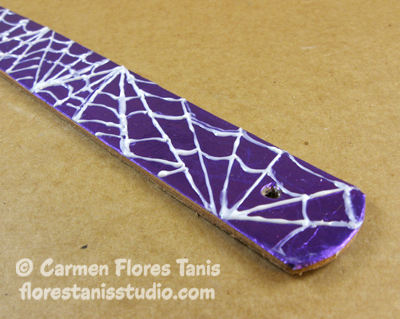
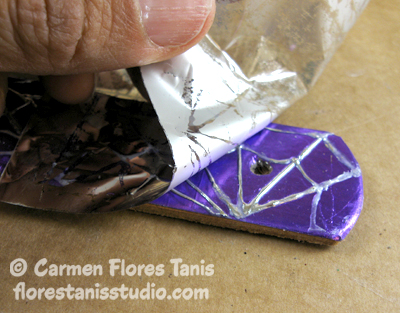
18. Apply silver foil to the glue and rub well. Peel off and now you’ve got shiny silver spiderwebs! Finish foiling the rest of the wristband.
19. Draw a little spider on the wristband with the 3D PVA glue. Let dry until clear then apply black foil. Fun!
Finishing
20. Use a black permanent marker on the edges of all the wristbands. I also like to brush a coat of acrylic sealer on the backs and edges to add a finished look.
21. Add snap closures if necessary. (Kool Tak foil applied with 3D PVA glue is water resistant but not water proof. So gently dab off (don’t rub) any water spots with a soft cloth and try not to wash the dishes wearing the wristbands.) Put on your wrist and enjoy! – Carmen