

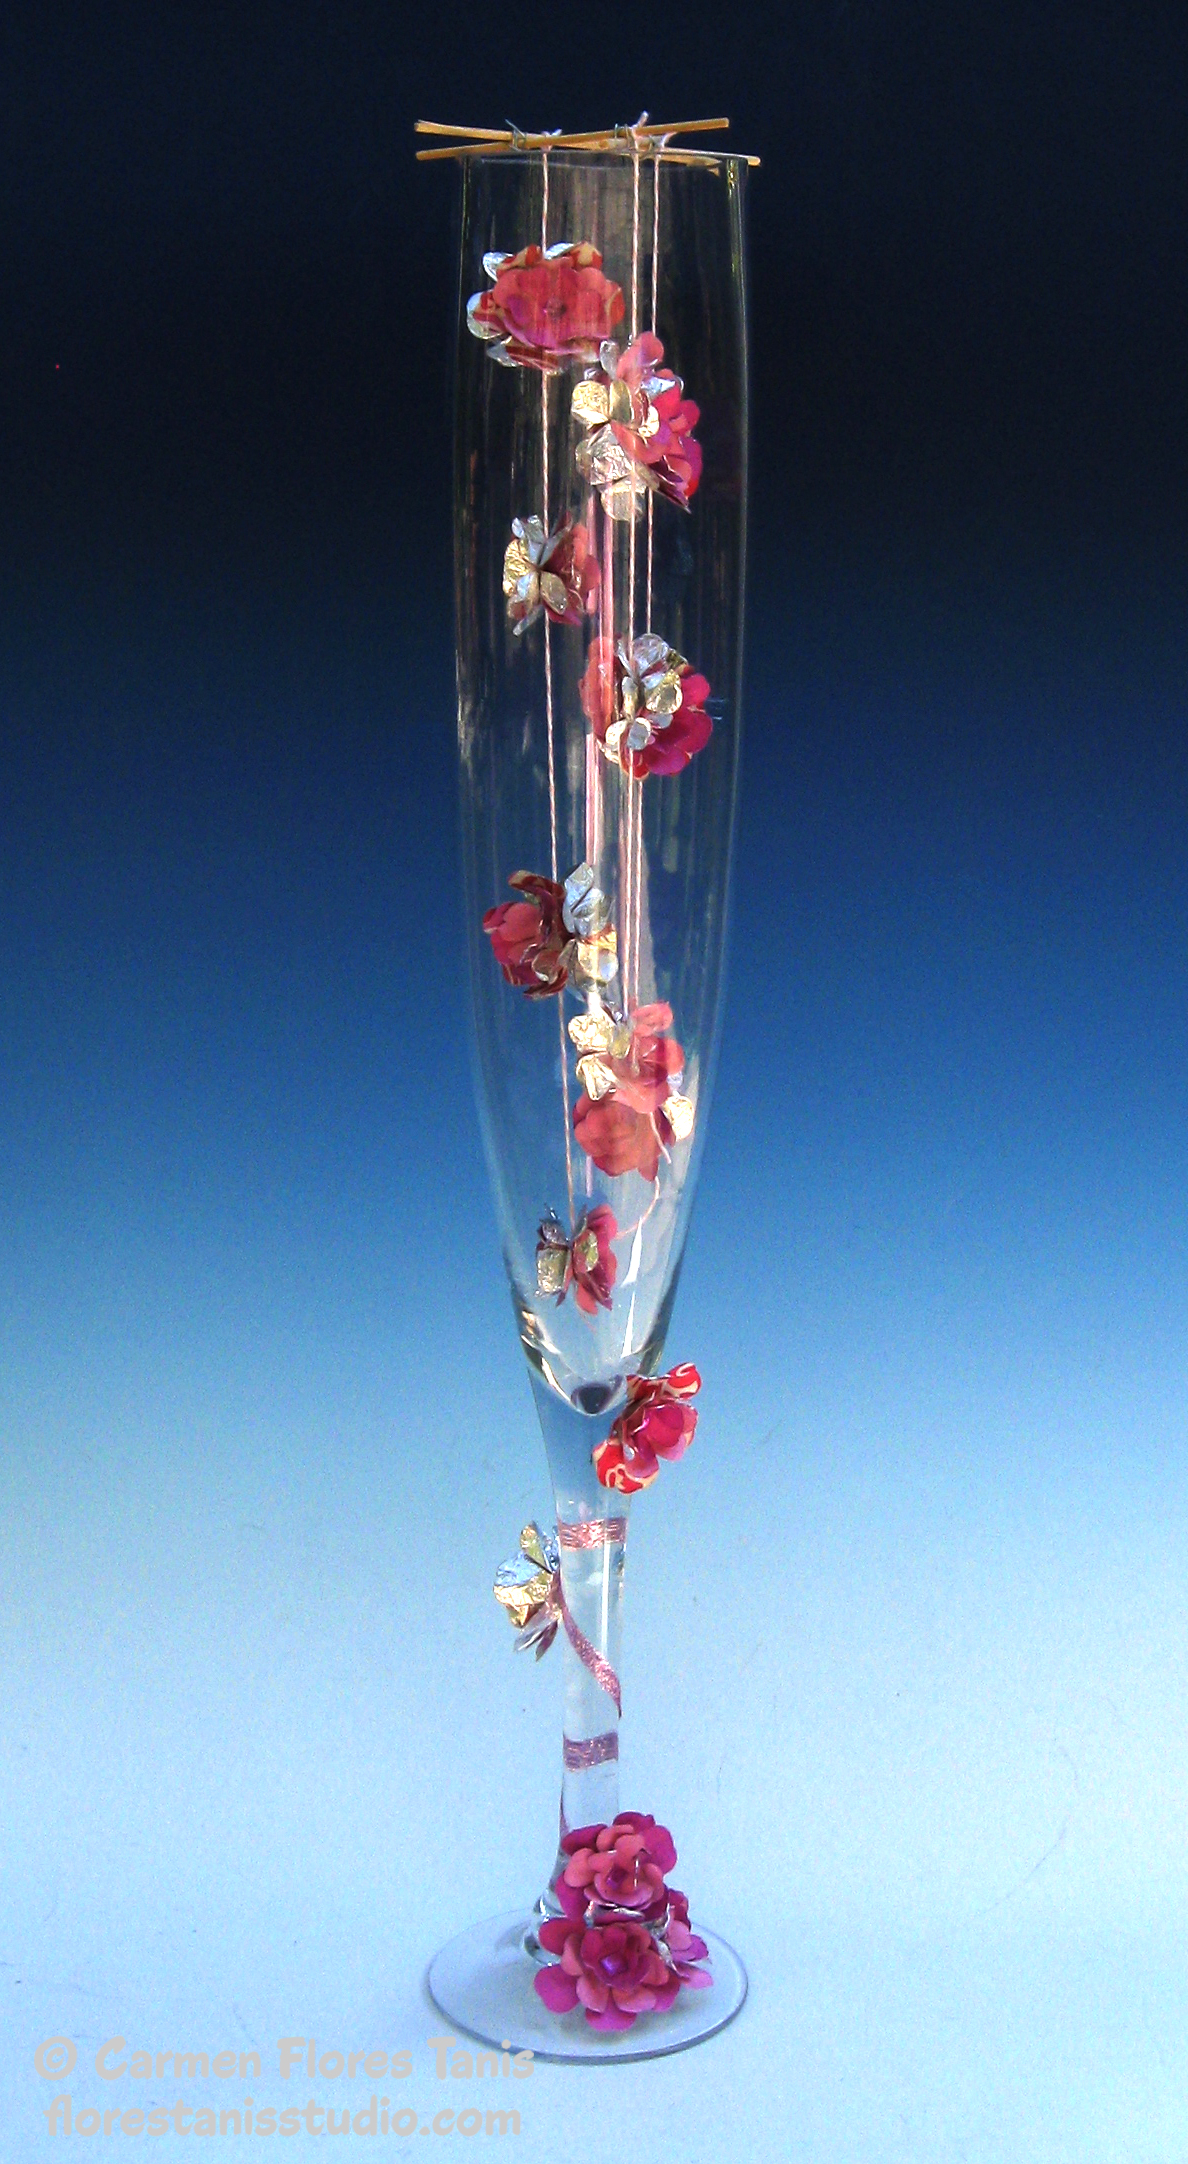
It’s summer and prime time for wedding celebrations! This pretty centerpiece will add a festive note to your celebration. Made from a giant glass champagne flute, it features dangling flower blossom strings reminiscent of falling cherry petals and rising champagne bubbles. And it’s so easy to make! The flowers are made from tissue paper for color, aluminum foil for shine and adhered together with Kool Tak™ Premium Extreme Double-Sided Tape for cool crafting magic. Add a little Kool Tak Foil Sheets and Sparkles glitter for shine and that’s the start of memorable party!
Materials:
Kool Tak™ Premium Extreme Double-Sided Tape – 2 1/2″ x 27 yards
Kool Tak™ ShinyTransfer Foil Sheets – Summer Blooms
Kool Tak™ 3D Foam – 1/4″ x 1/4″ x 1/32″ thick, 144 pads – CLEAR
Kool Tak™ Ultra Clear Double Sided Tape – 1/4″
Kool Tak™ Sparkles Bonus Pack – Pink
Giant glass champagne flute – (the one I used is 26″ tall)
Tissue paper – assorted pink shades
Roll of aluminum foil
Wood skewers
Wire
Twine
Tools:
Scissors, die cut machine and flower die, wire cutters, cookie sheet with sides and sheet of paper (to catch the glitter), glass cleaner and paper towels
Instructions:
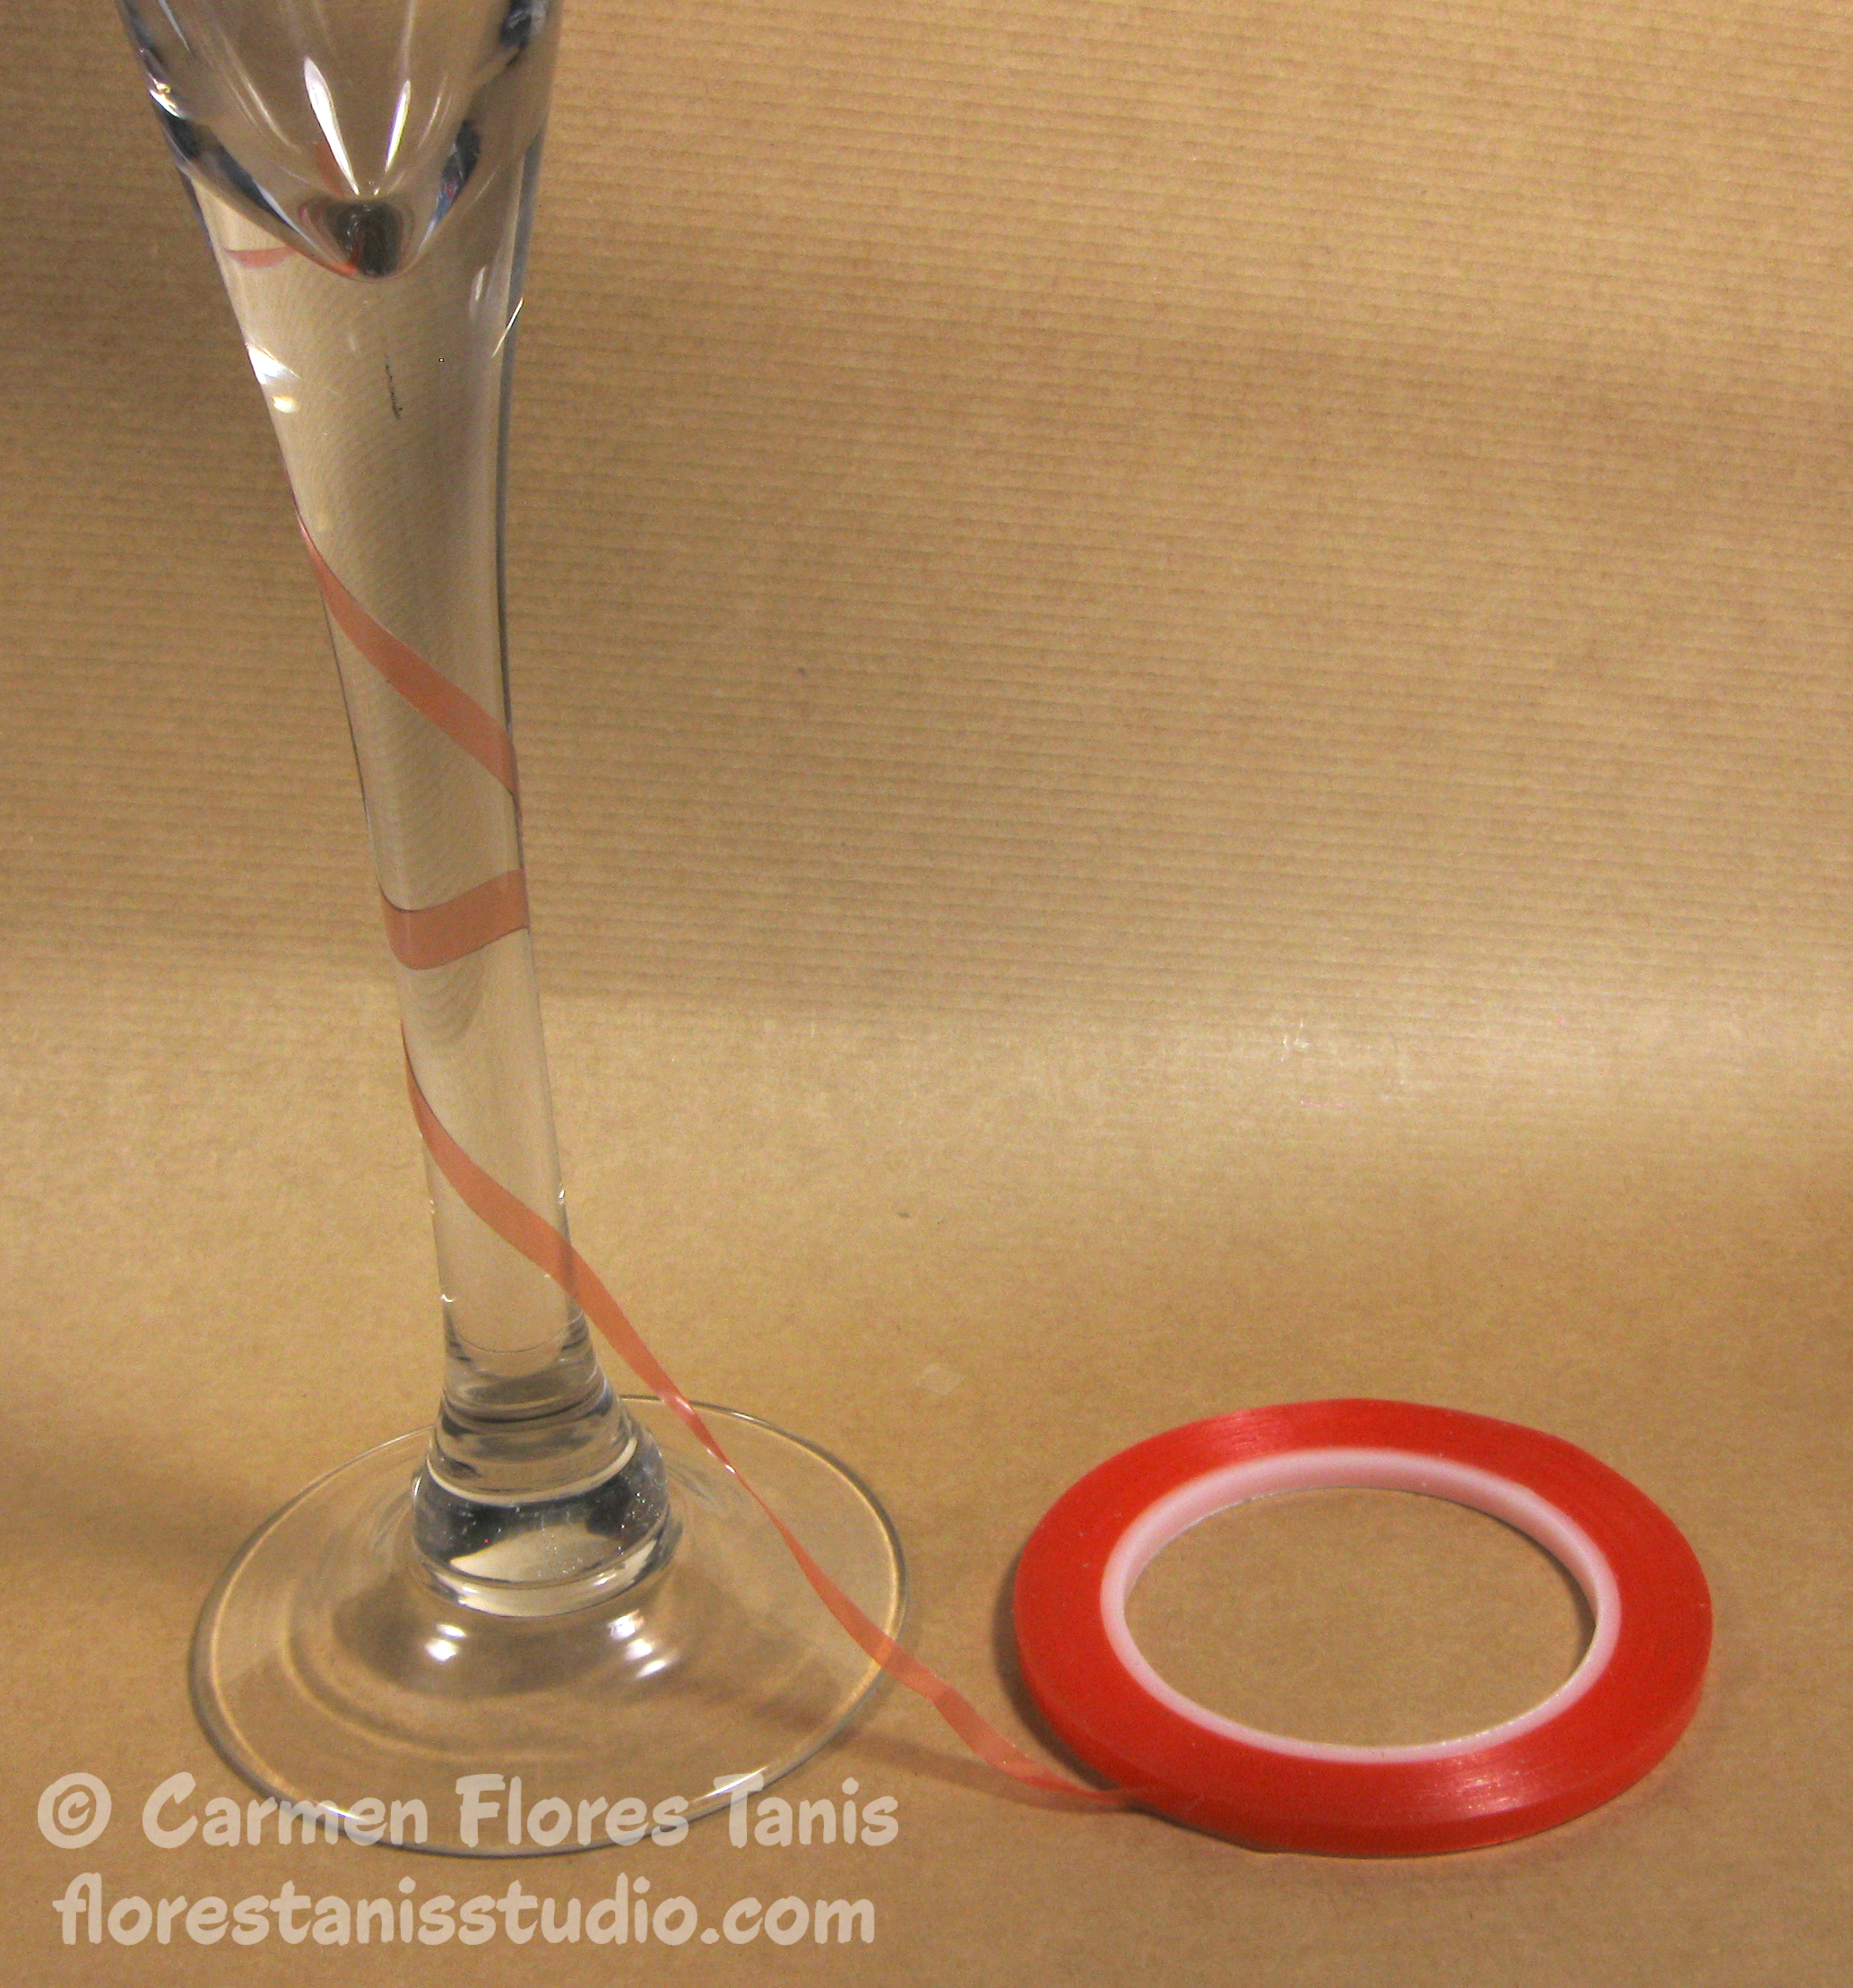
1. Clean the glass flute with glass cleaner and a paper towel. Starting at the top of the glass stem, wrap the stem with a twist of Ultra Clear Double Sided Tape and cut the tape where the stem meets the base.
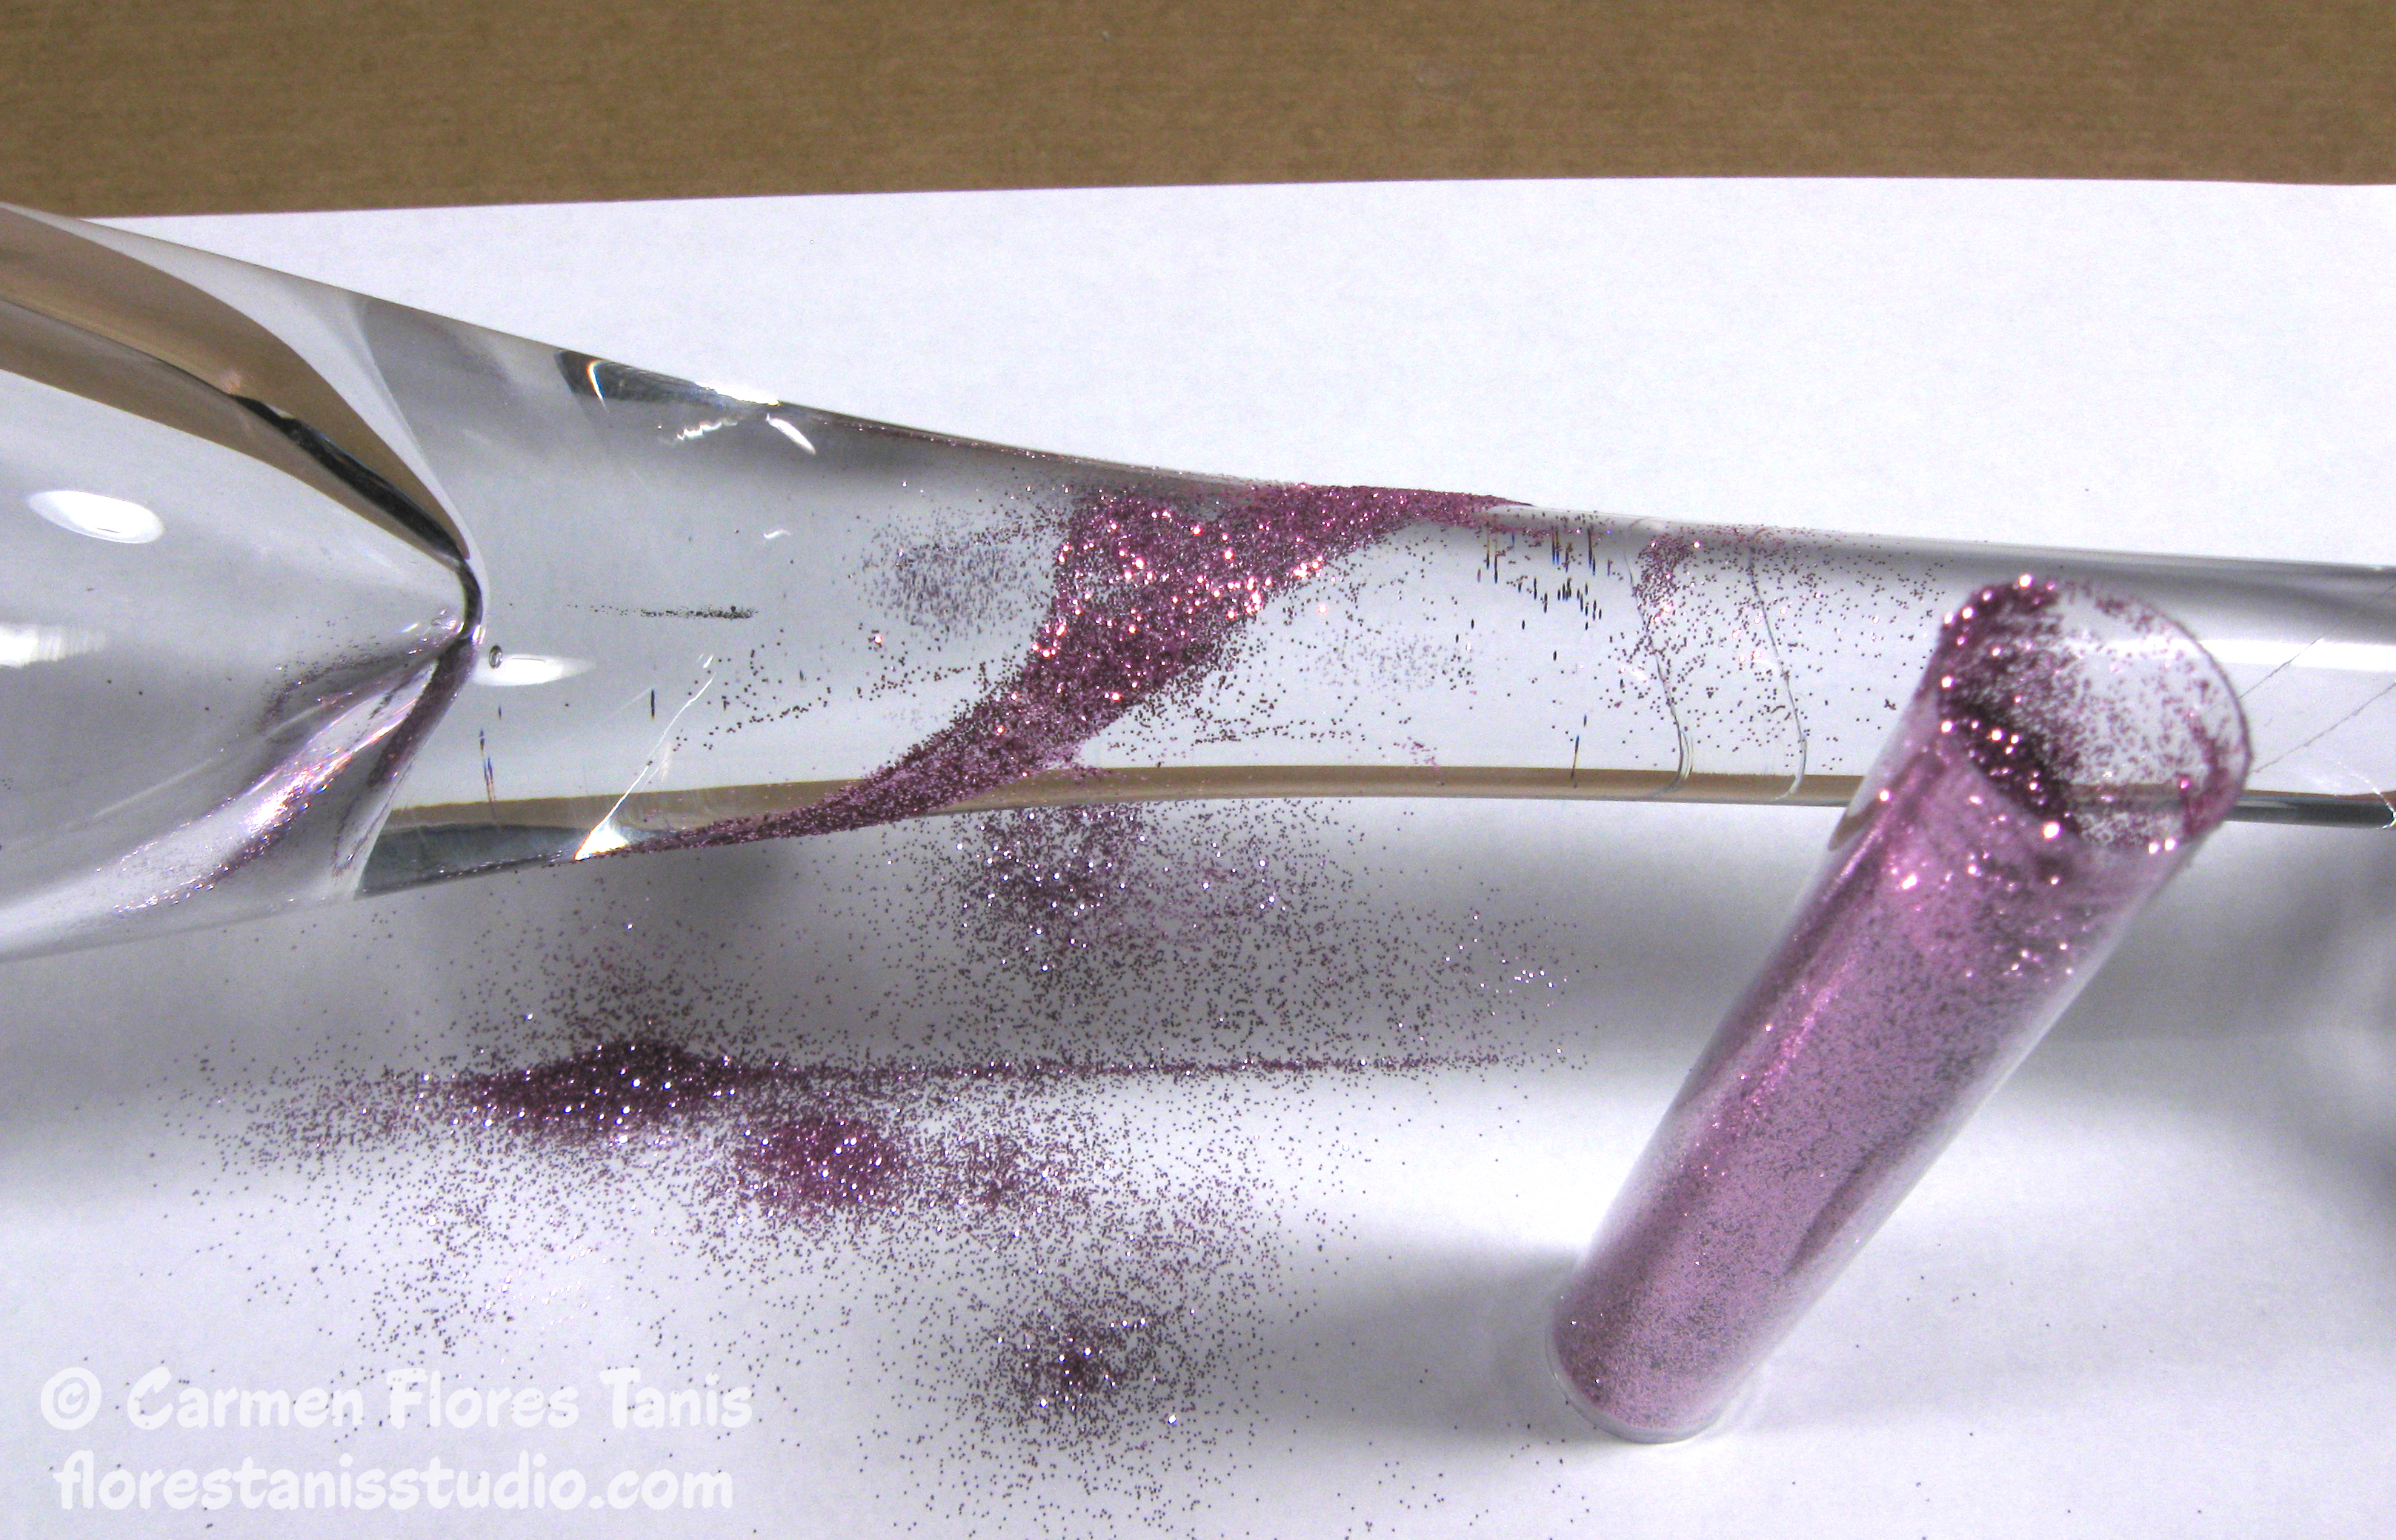
2. Remove the red release plastic from the Ultra Clear Double Sided Tape to expose the adhesive. Holding the glass flute over a cookie sheet lined with a sheet of paper, sprinkle pink Sparkles glitter onto the sticky tape. Use the sheet of paper as a funnel to help return the excess glitter back into the tube.
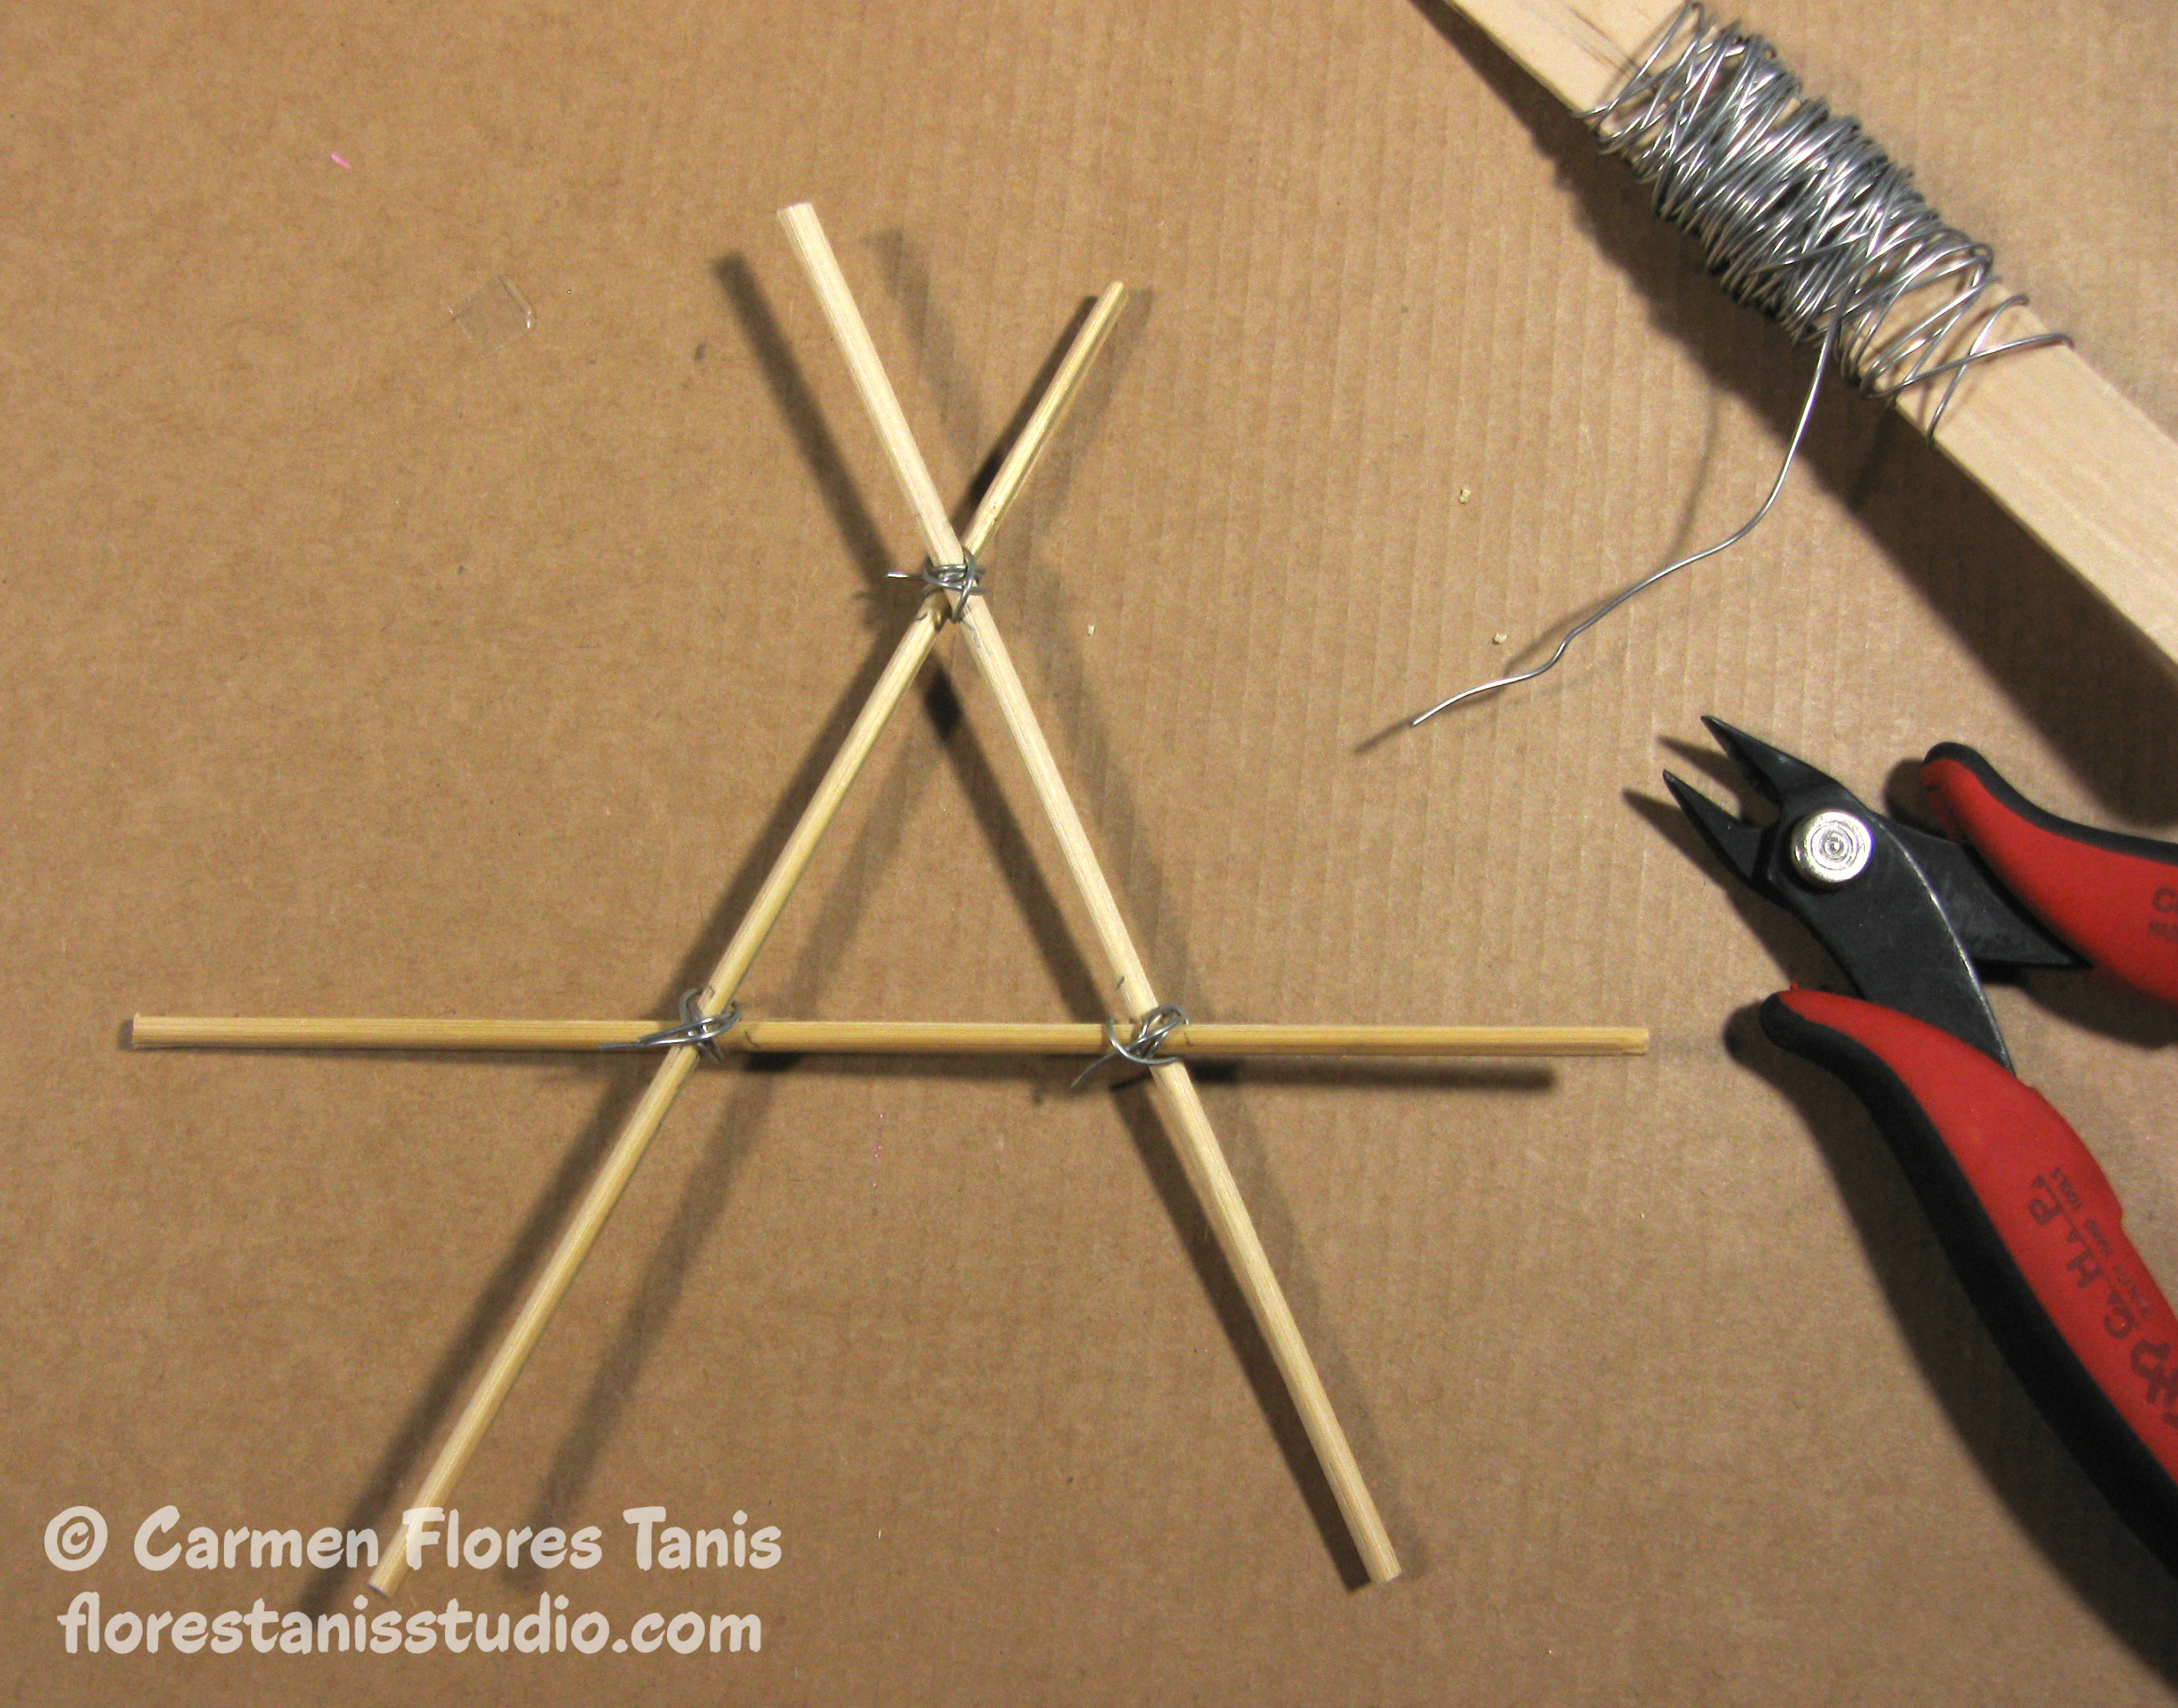
3. Cut three wood skewers each 2” longer than the opening of the glass flute. Overlap the three skewers into a triangle and secure the joins with wire.
4. Attach the wood skewer triangle to the top of the glass flute with three 3D Foam pads.
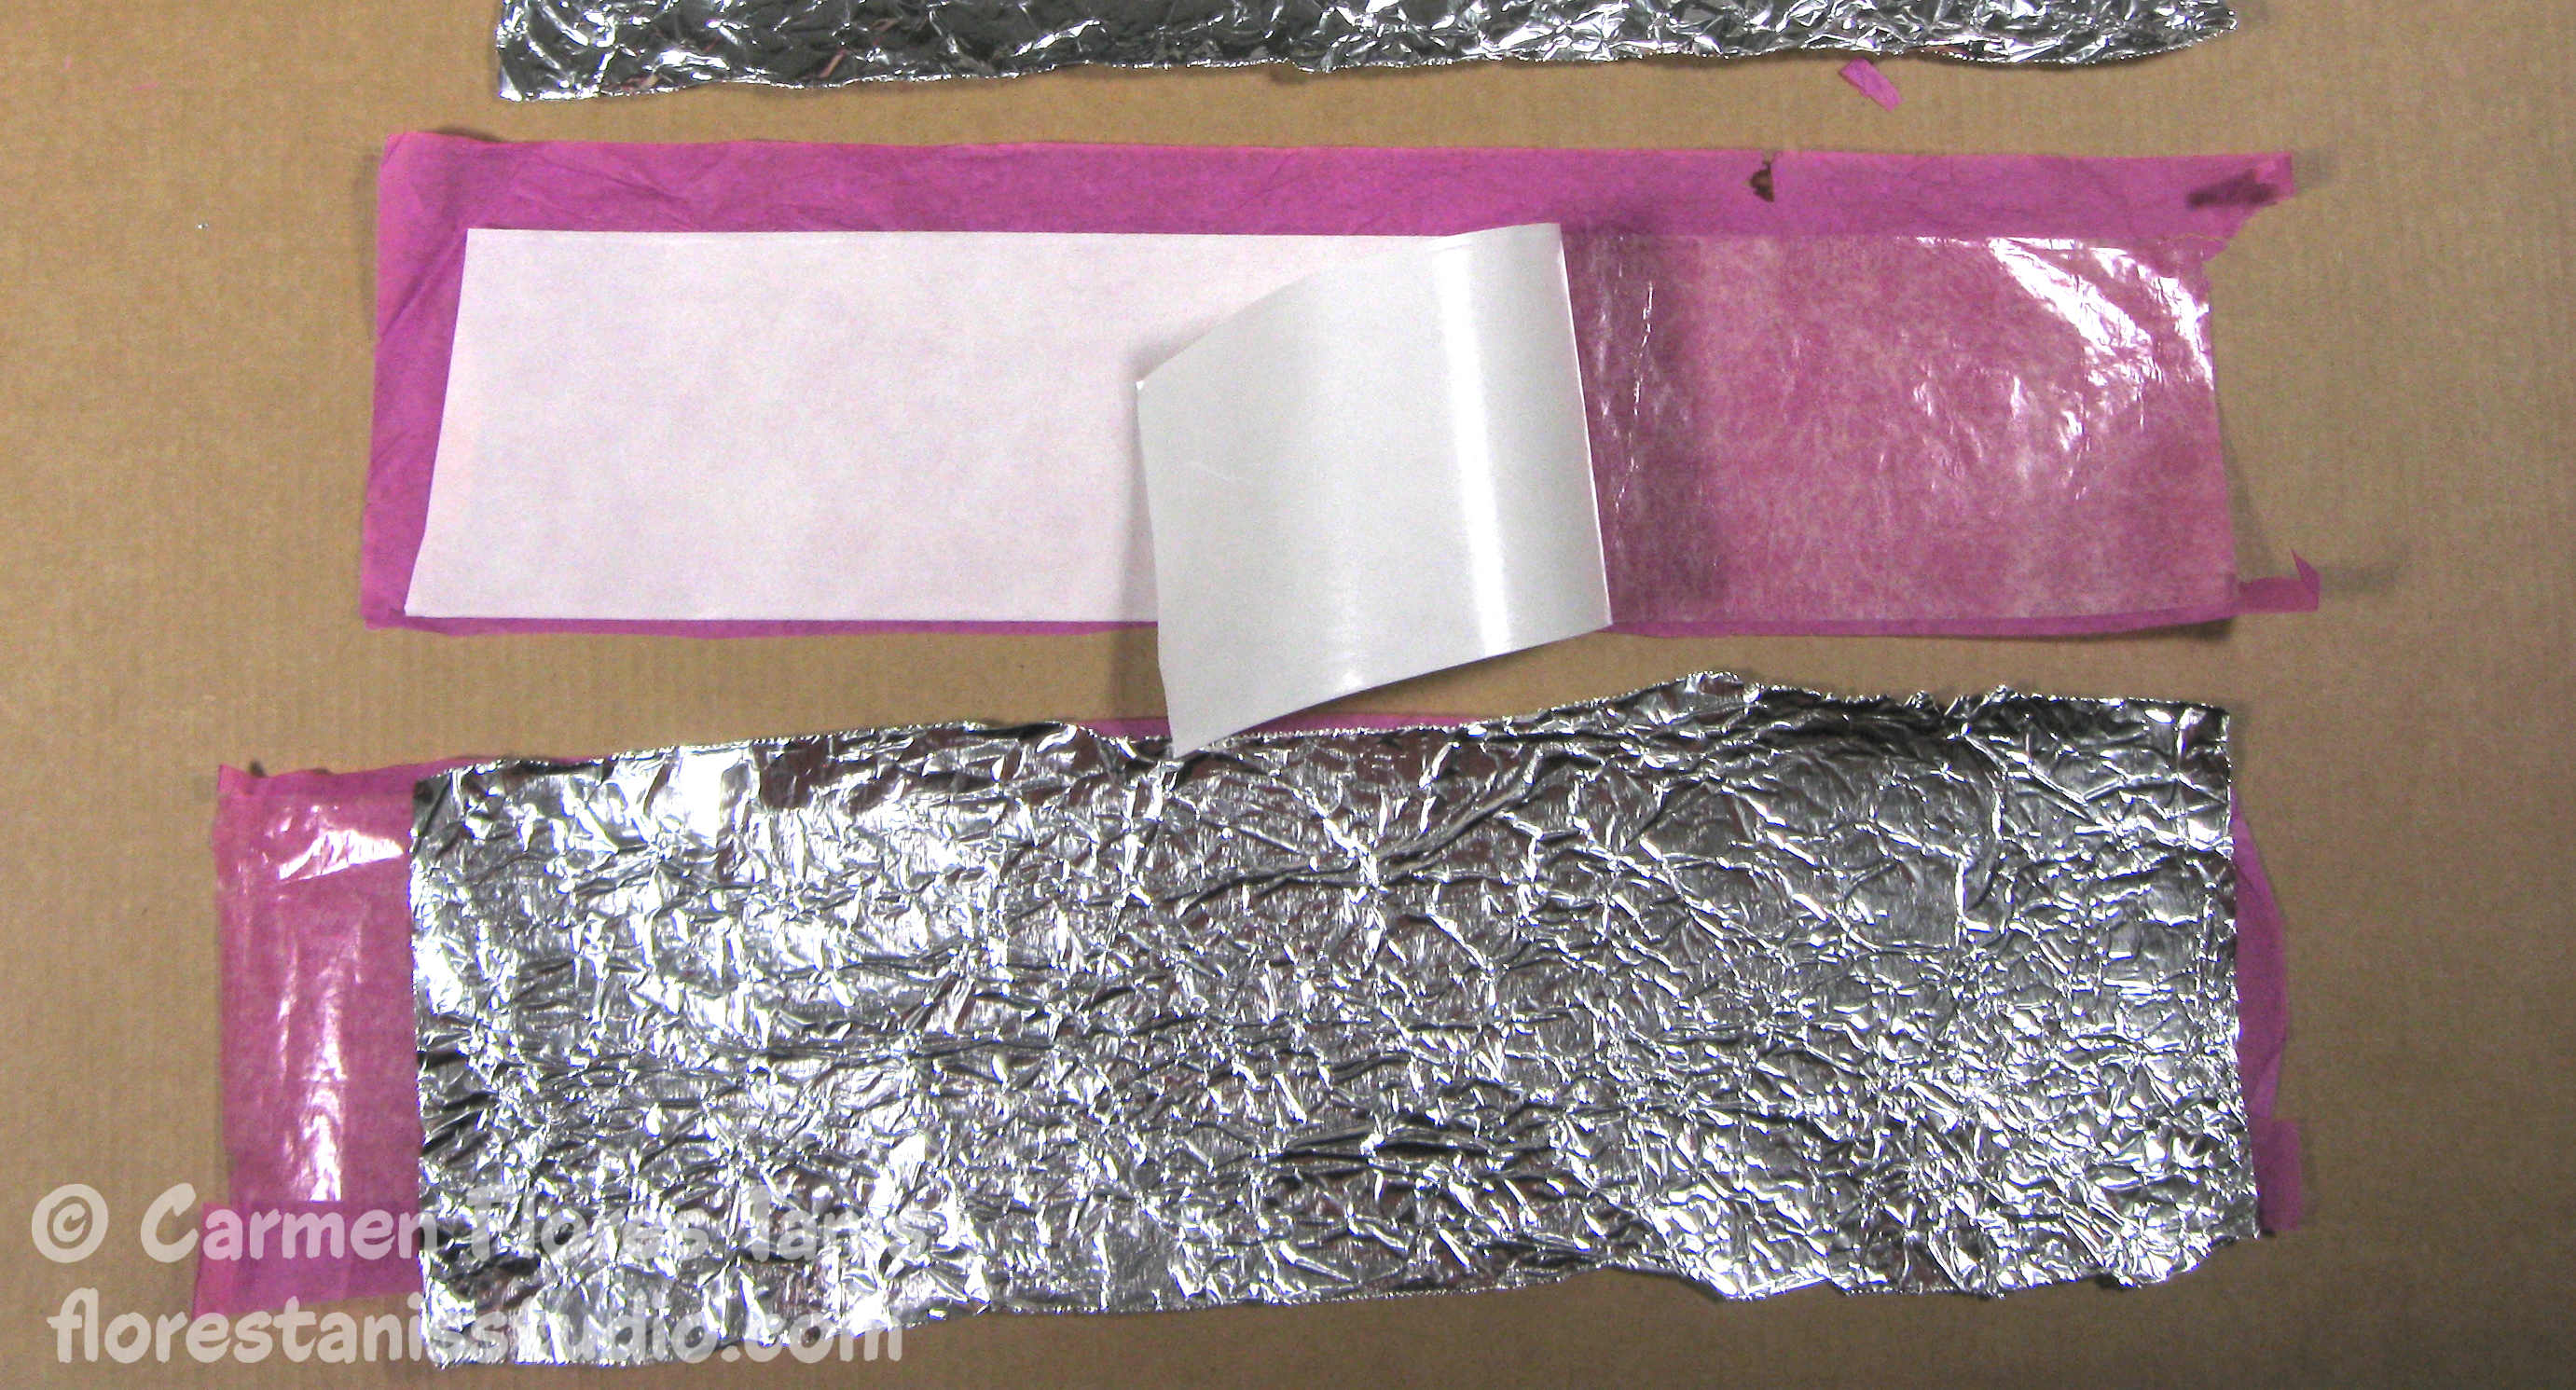
5. Cut the tissue paper into roughly 4” wide by 12” long strips. (You can make them a little longer if your roll of aluminum foil is wider.)

6. Tear a few sheets of aluminum foil roughly 4” wide. Lightly crumple up the foil and then smooth back out. (This will add some pretty crinkling to the flowers.)
7. Stick a length of Premium Extreme Double-Sided Tape onto a cut piece of tissue paper. Remove the white paper release sheet to expose the adhesive and top with a cut piece of aluminum foil, shiny side up. Trim the extra tissue and foil from the sides and ends so you have a nice stuck together “sandwich” which will fit easily in the die cut machine. Repeat for the remaining pieces of foil and tissue paper.
8. Cut the tissue/foil sandwiches into various sized flower shapes using a die cut machine and flower die.
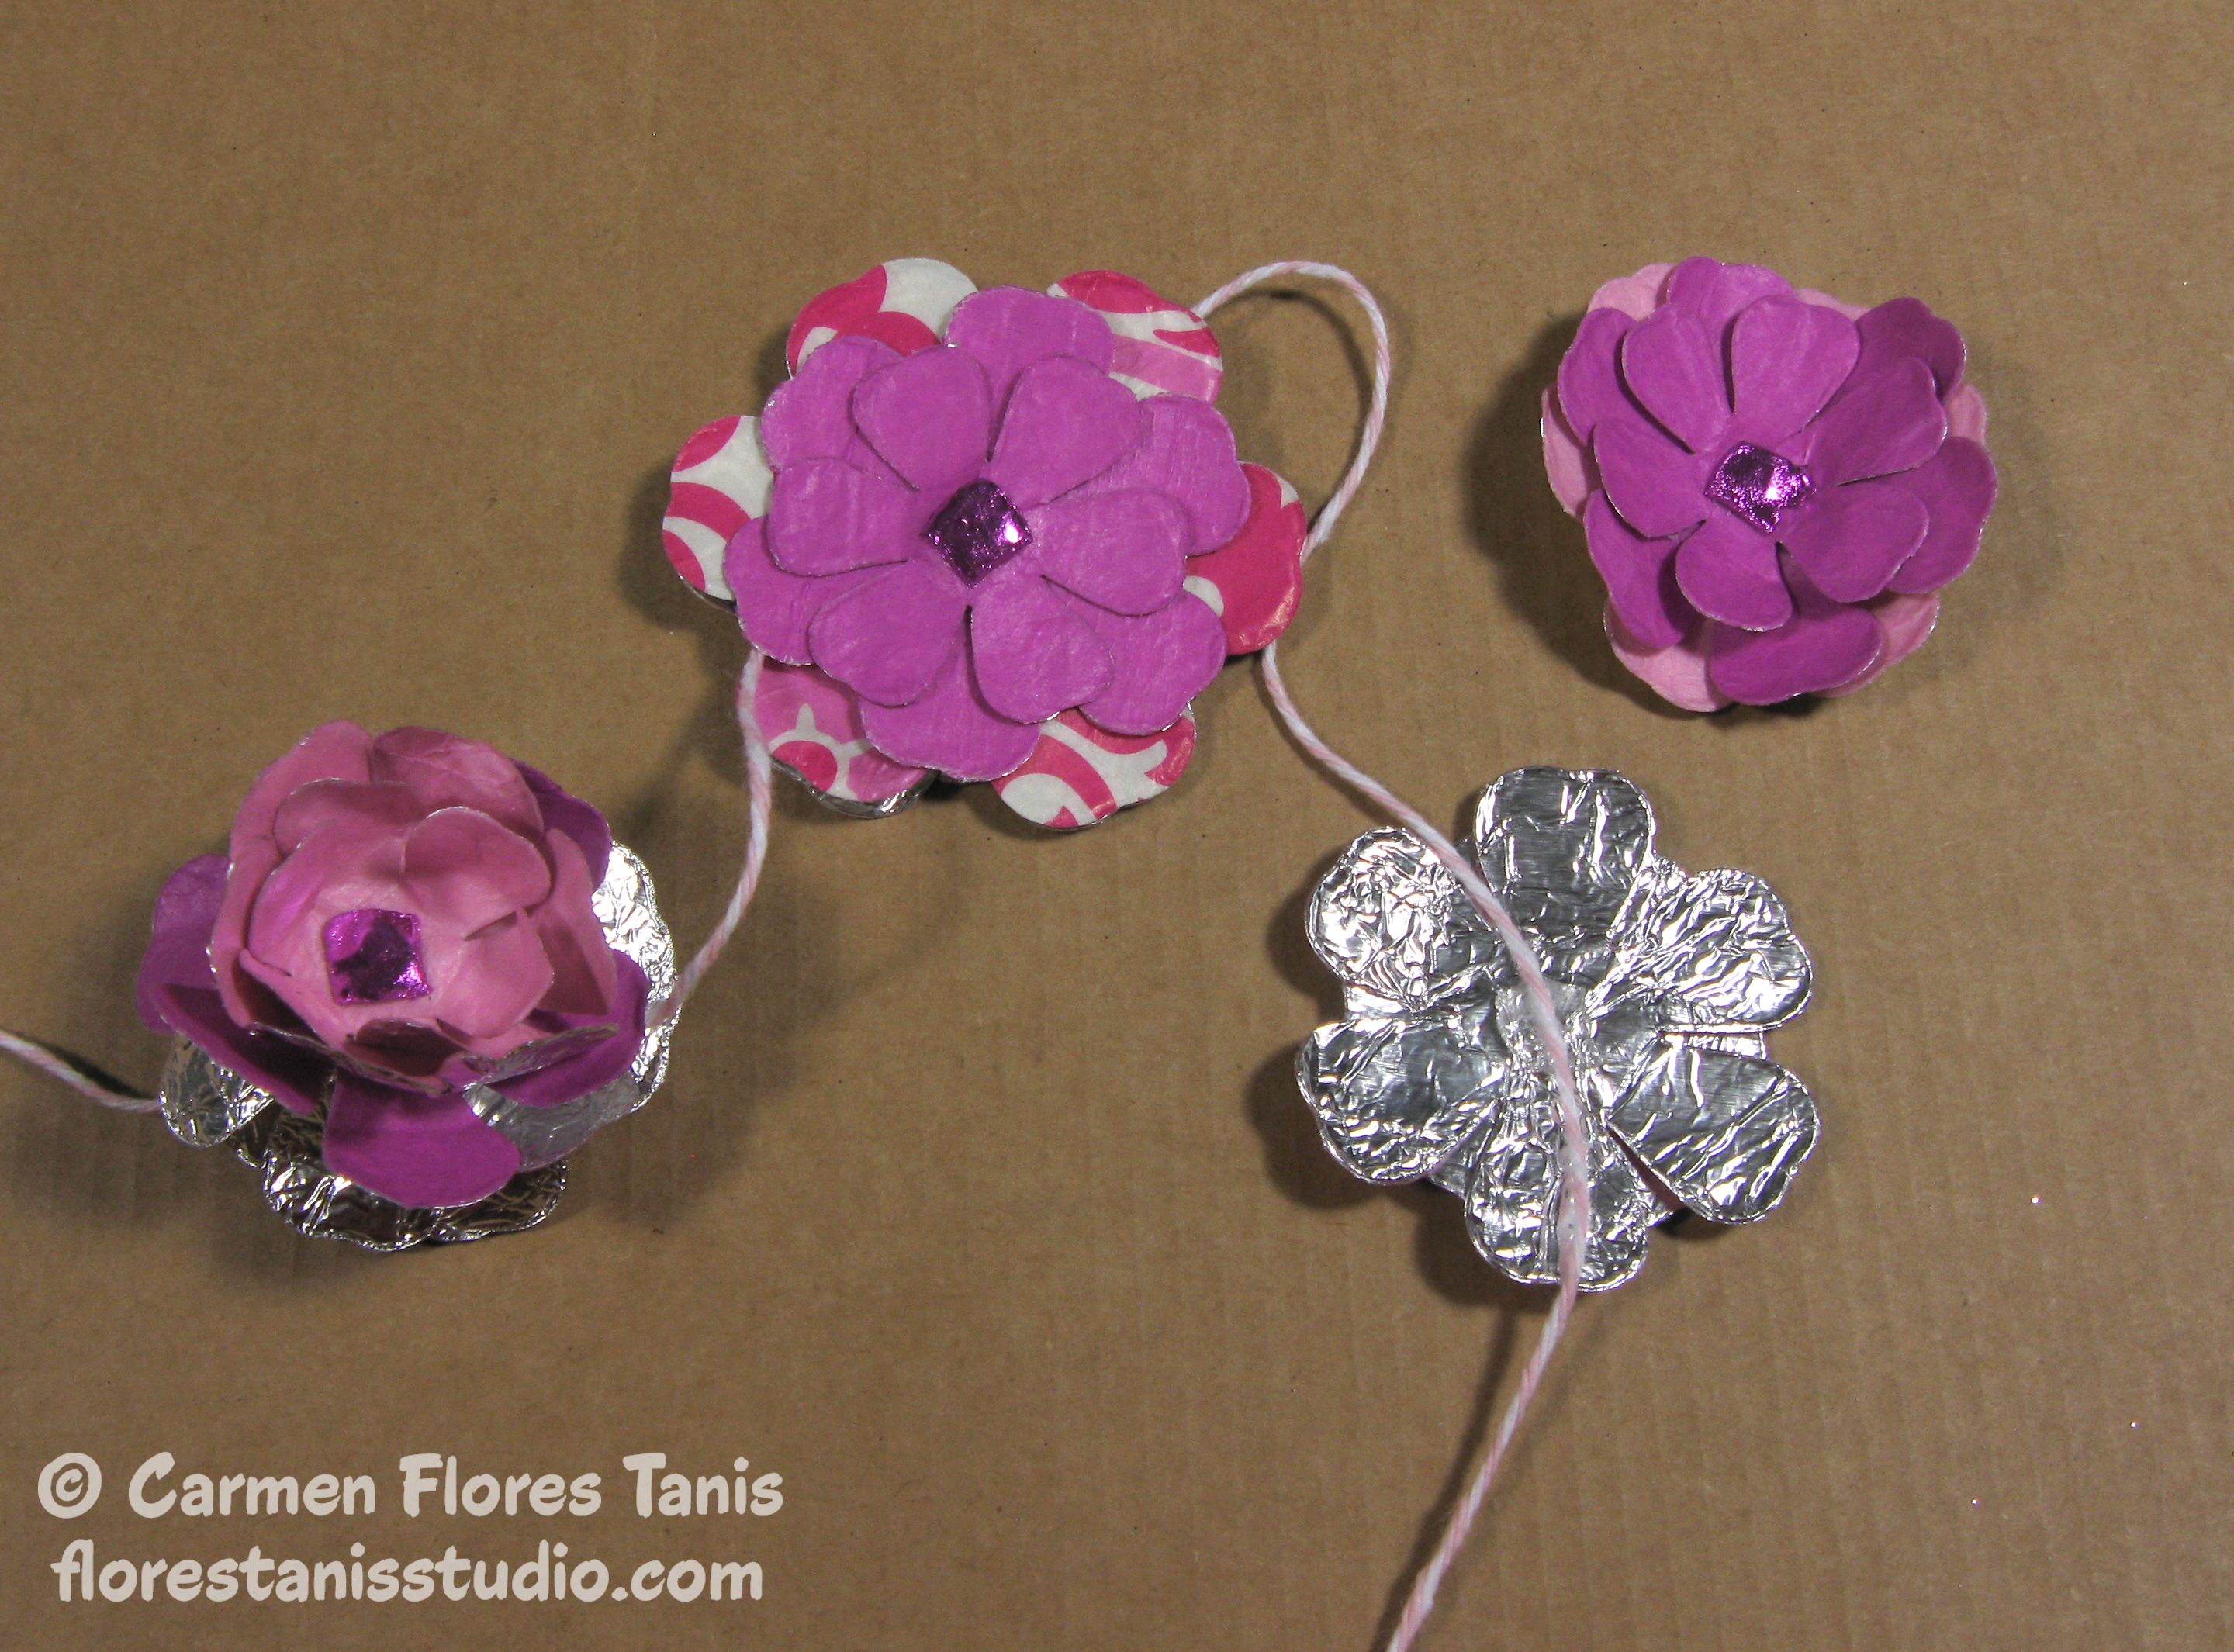
9. For each flower stack, select three flower shapes and add a 3D Foam pad to the foil back side of the two top flowers. Stick together into a stack. Repeat for all the flower shapes.
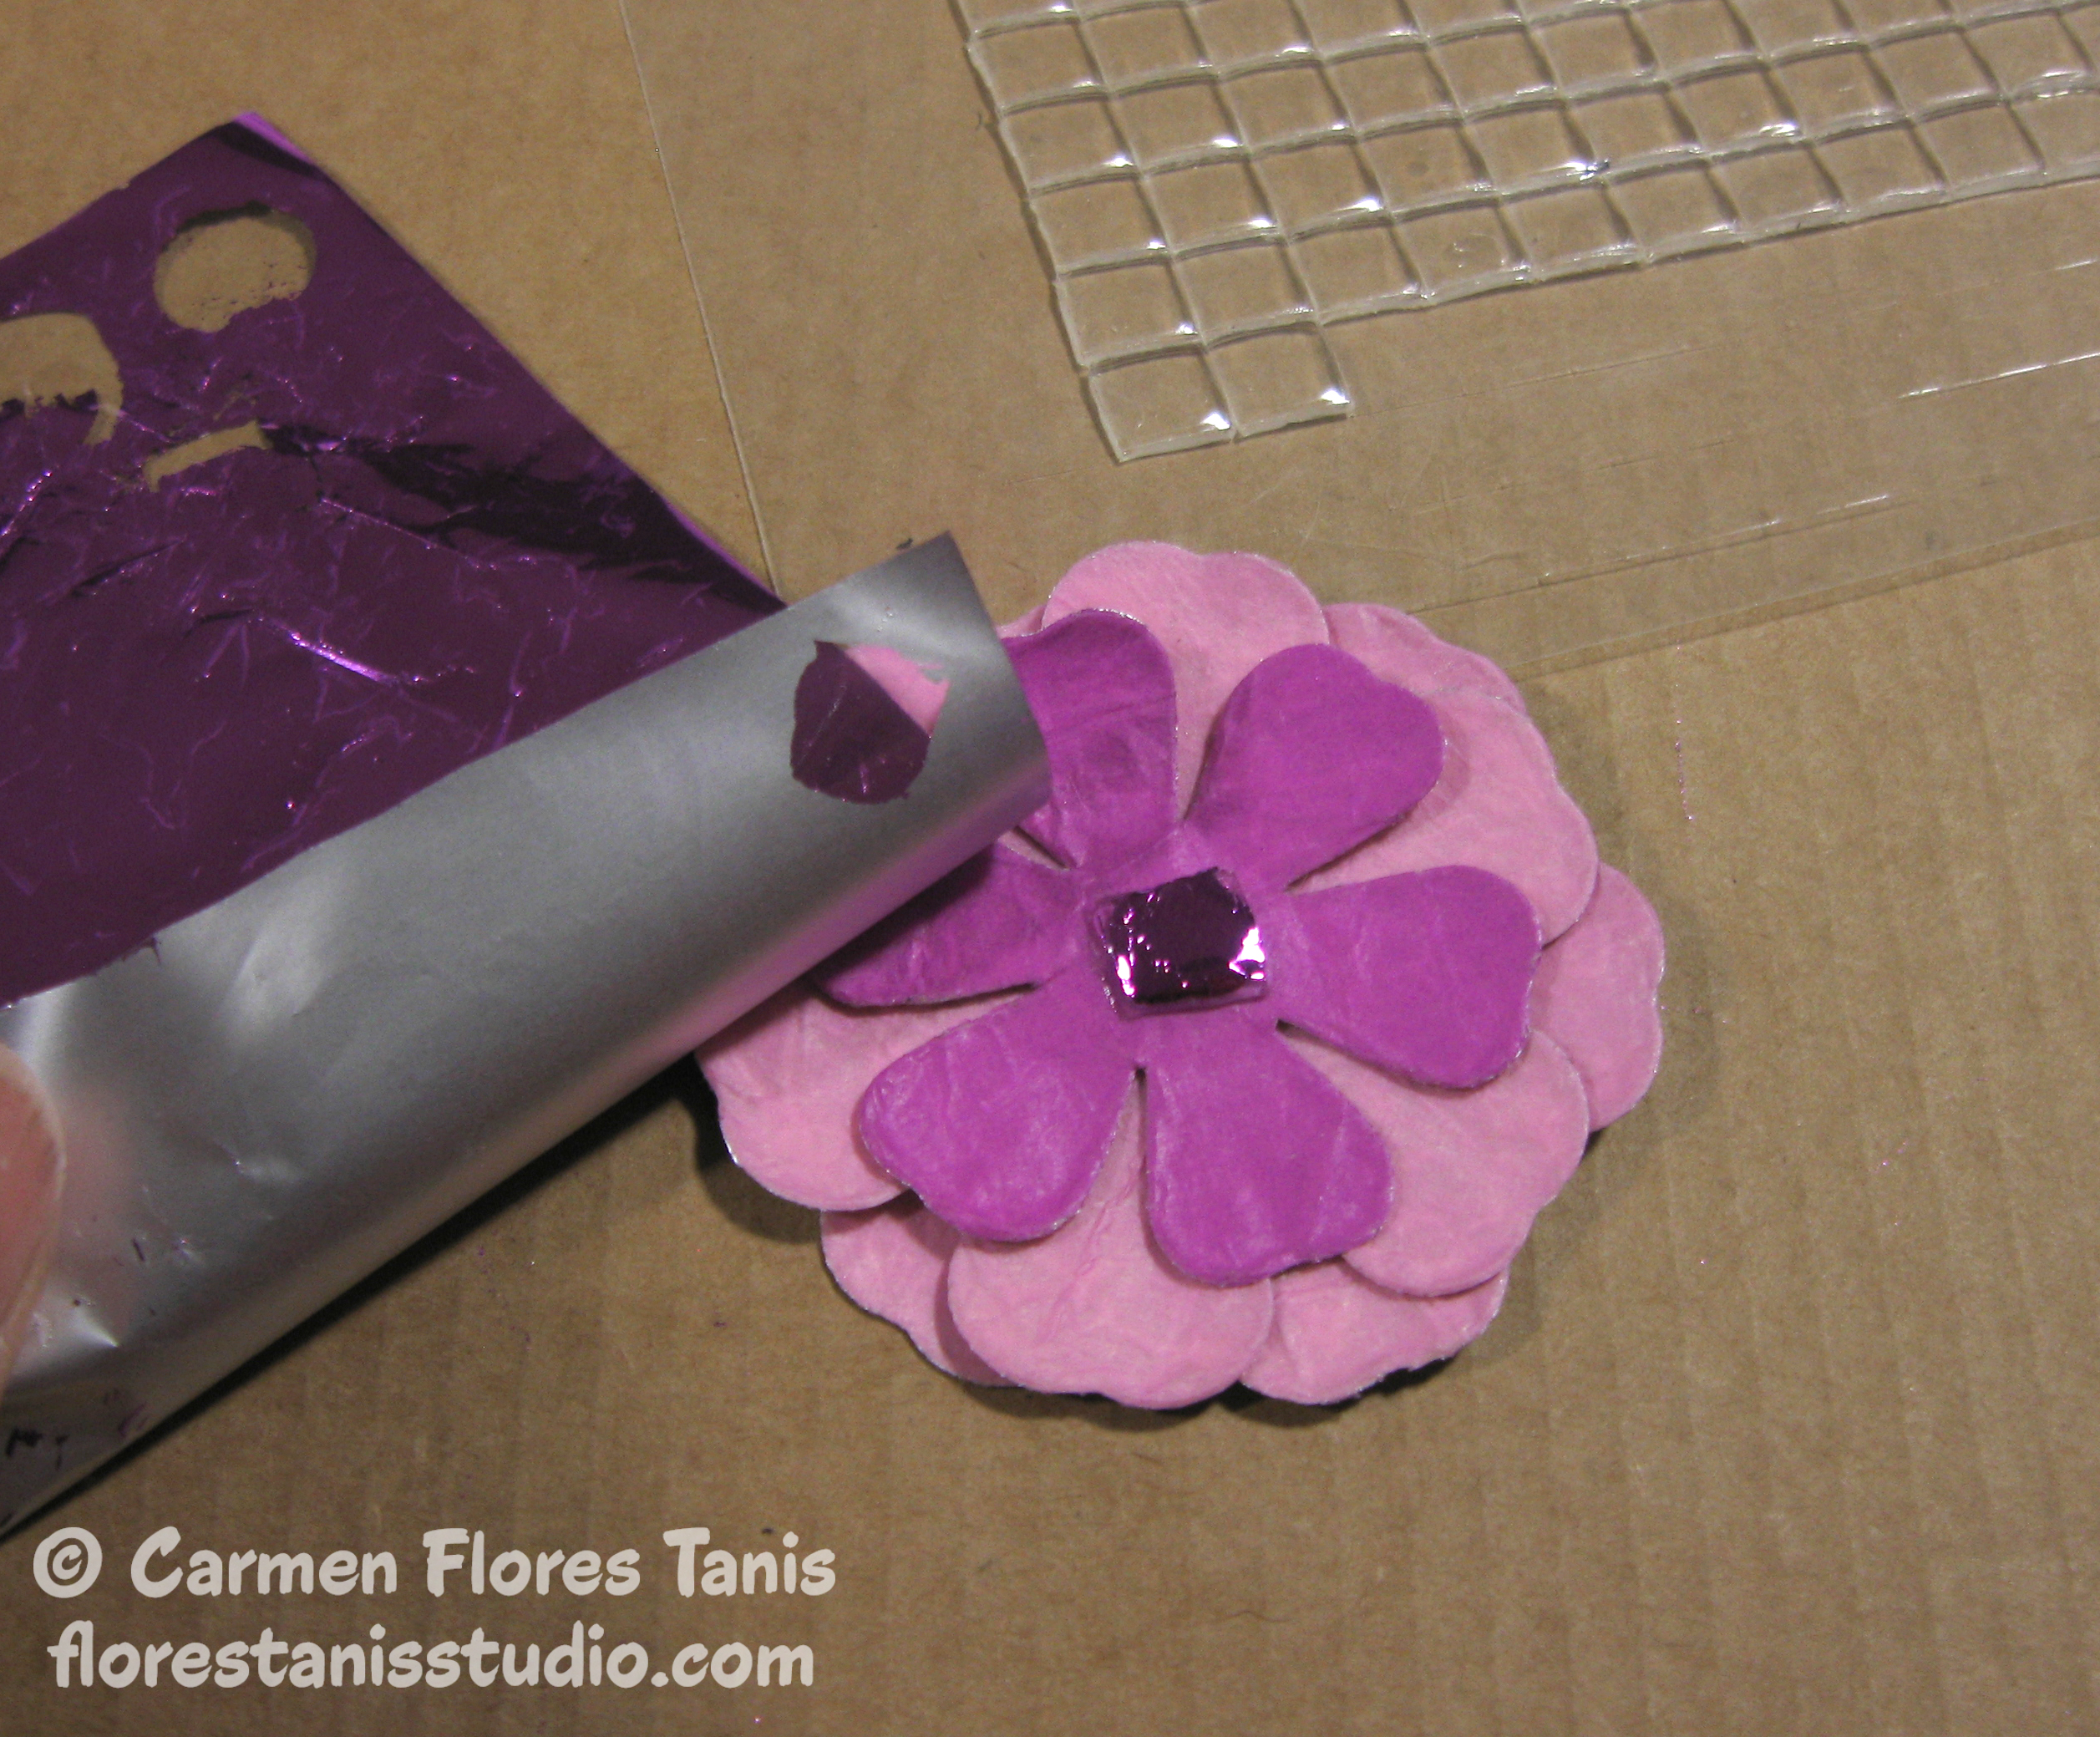
10. Let’s add a little sparkle to each flower center. Place a 3D Foam pad in the center of a flower stack and peel the clear plastic release liner to expose the adhesive. Press a pink Shiny Transfer Foil Sheet onto the adhesive and rub gently so that the foil sticks. Lift the sheet off and repeat for the remaining flower stacks.
11. To make the strings of flowers which will hang inside the glass flute, cut three pieces of twine a few inches longer than the length of the bowl part of the glass flute. Take one flower stack and add a 3D Foam pad to the back. Press one piece of twine onto the pad and top with another flower stack. Continue adding flower stacks to the twine until you are happy with the placement. Fluff up each flower by bending up the petals of each flower layer .
11. Carefully slip each flower string into the flass flute and tie it to the wood skewer triangle to secure.
12. Finish off by adding a few more flowers to the base of the glass flute with 3D Foam pads.
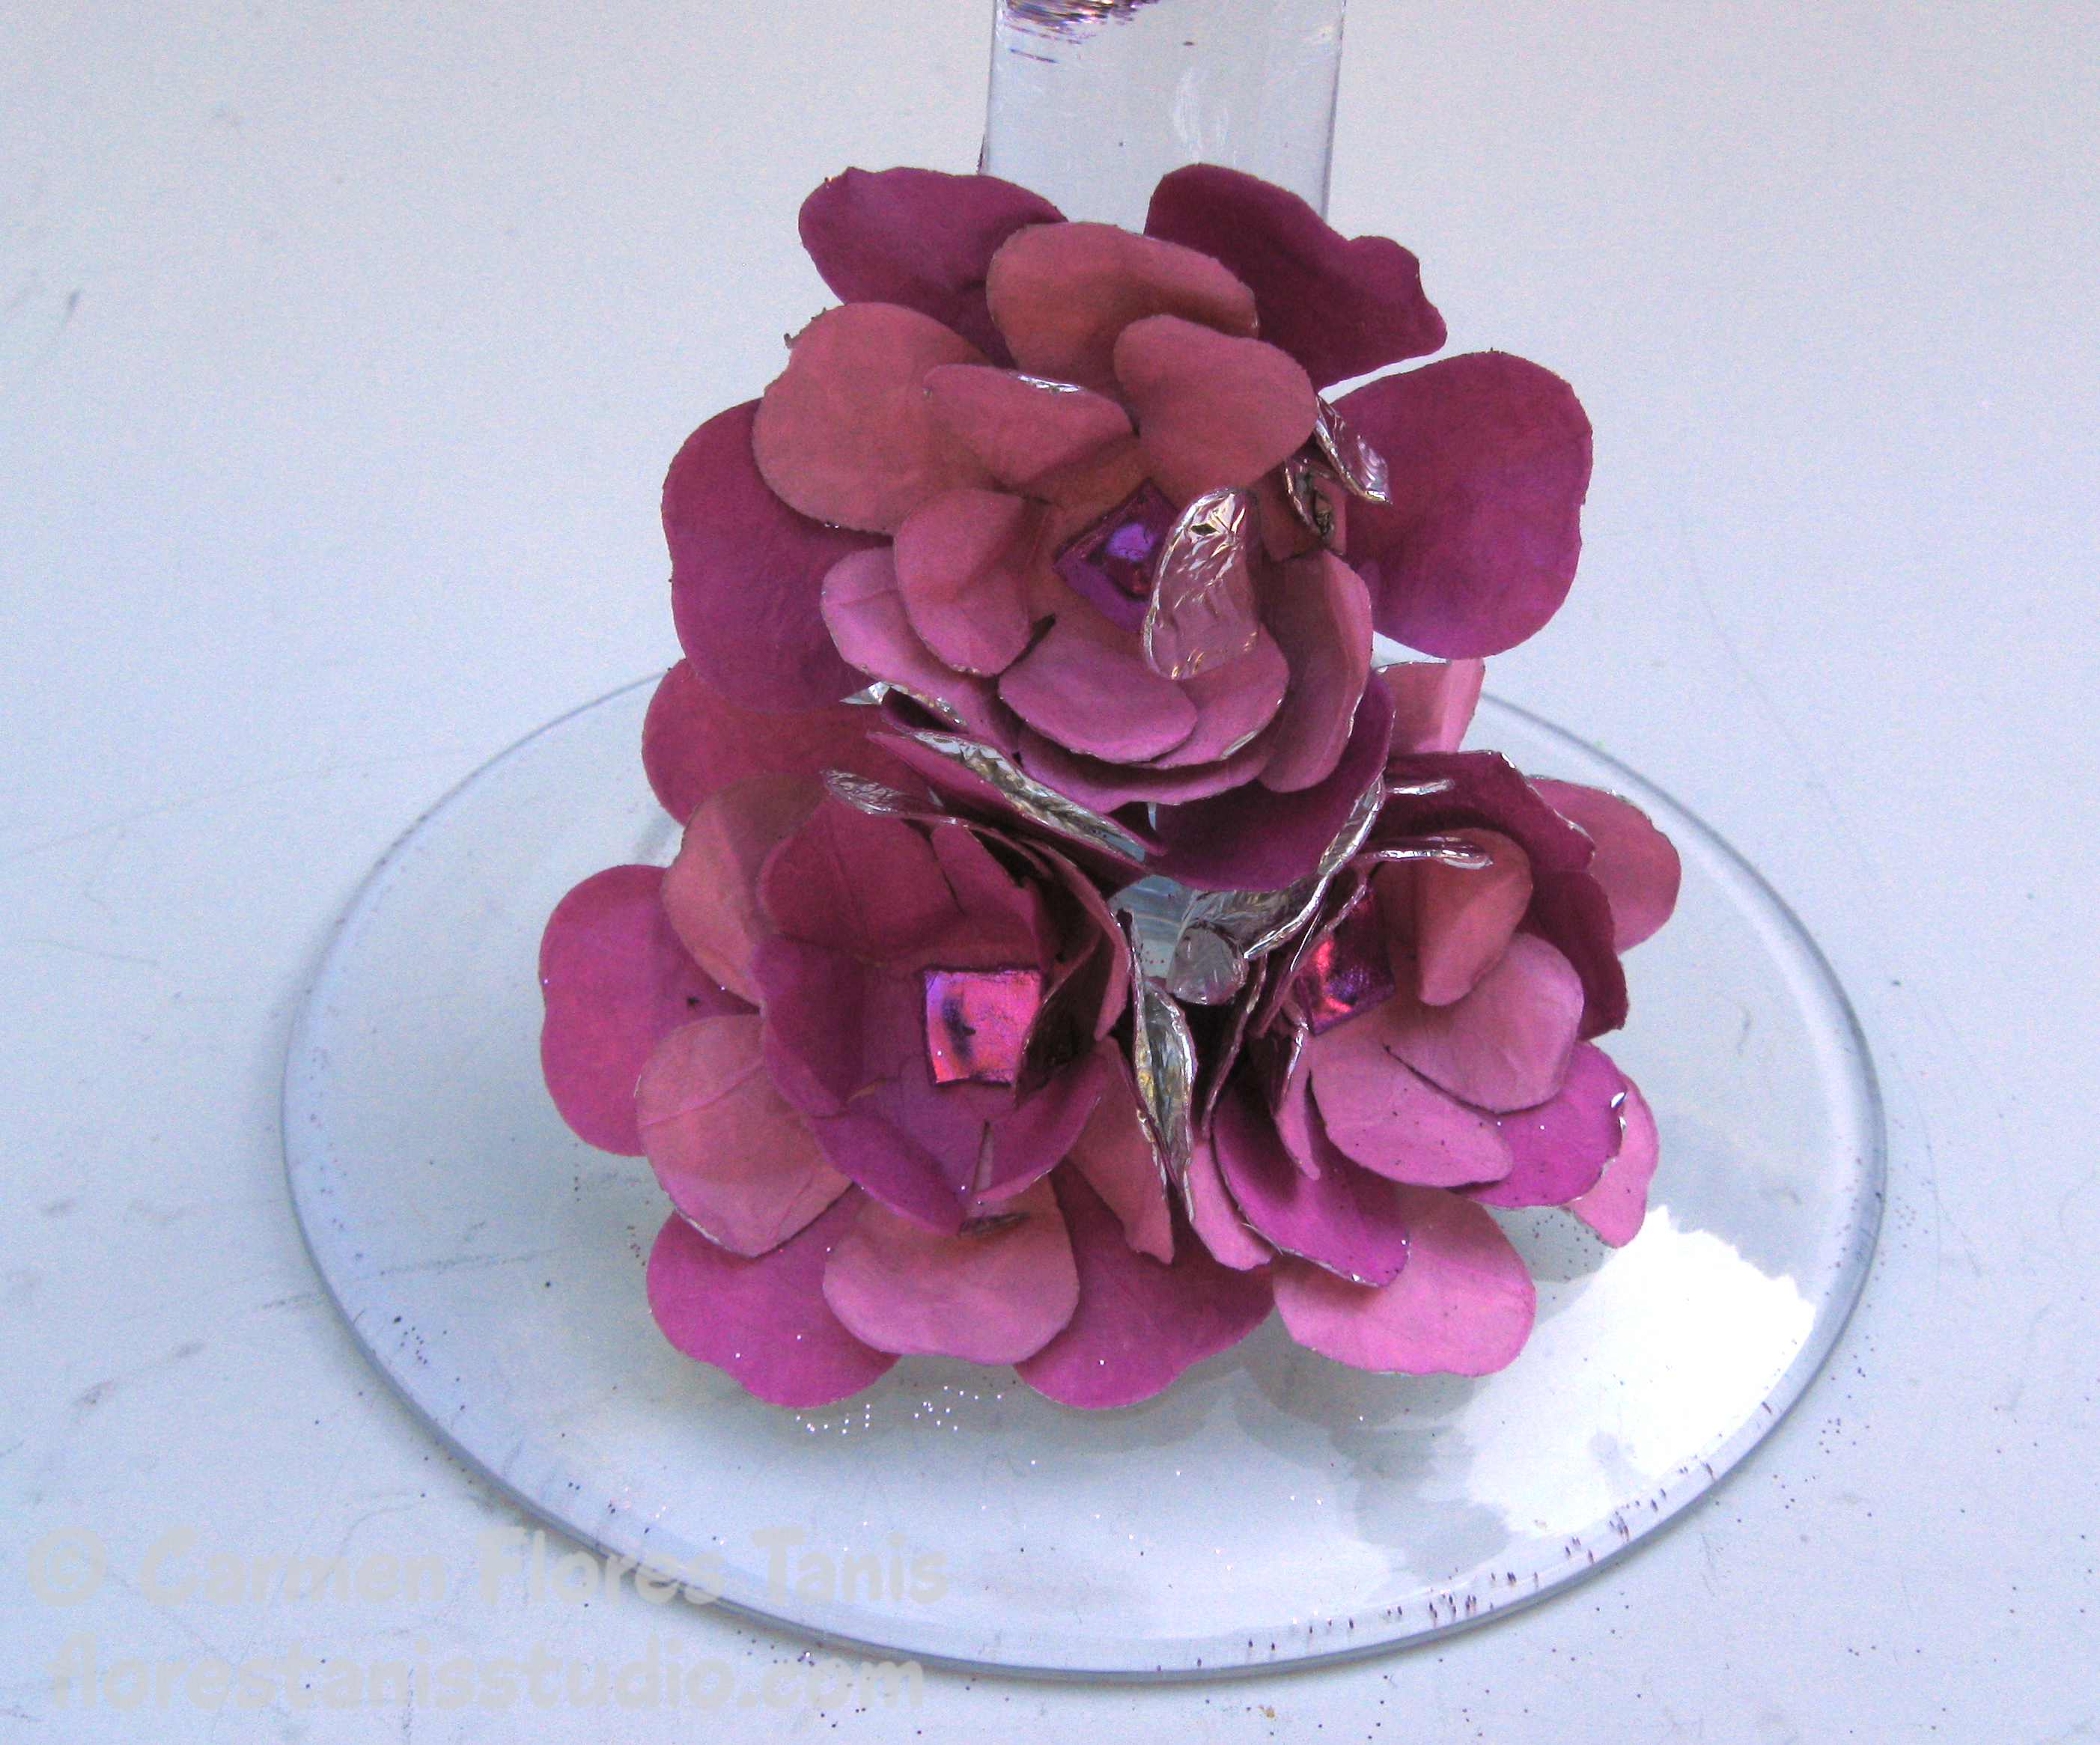
This centerpiece is easy to customize using other colors. Instead of silver aluminum foil, try using printed foils made for confections to add even more color. And instead of doing flowers, you could cut out butterflies or circles for totally different looks! Now raise your glasses and toast because your celebration will be extra special with a handmade centerpiece fashioned in your own favorite theme.
Gorgeous centerpiece for any event, Carmen!
Thank you, Beth! I’m so glad you like it! It was very fun to make with all the Kool Tak goodies!