
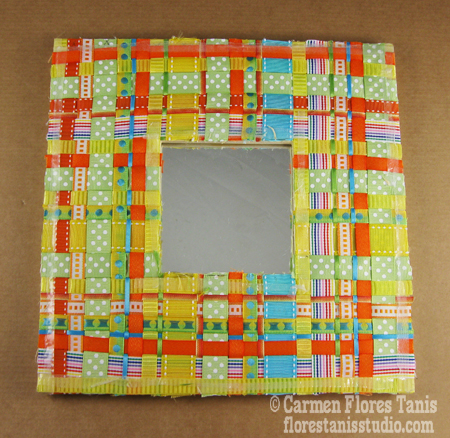
There is a flowering plum tree in front of my house that bursts into full bloom every March. It always inspires me to switch my color palette from dark wintery shades to the bright and cheery colors of Spring. I had been playing with the idea of weaving something out of my huge stash of colorful ribbons but couldn’t find an easy and clean way to construct the ribbon mirror project that I envisioned. But then I discovered Kool Tak™ Strips! They come in precut individual strips which you peel off and easily apply to your project. Plus when you want just a little bit of adhesive but don’t want to wait for a liquid glue to dry, you can tear off pieces of Kool Tak™ Strips and quickly complete your work. I love me them Kool Tak™ Strips!
Here’s how you can make your own Woven Ribbon Mirror and bring a little springtime cheer into your home!
Materials
- Kool Tak™ Strips Variety Pack
- Wood Mirror Frame
- Assorted Ribbons (10 yards will cover a 10” x 10” frame)
Tools
- Scissors, pencil
Instructions
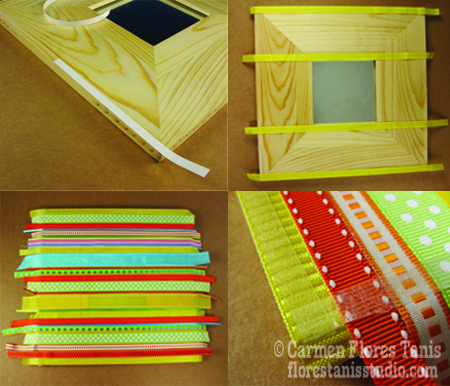
1. Apply 1/4” Kool Tak™ Strips all along the front outside and inside perimeter of the wood frame removing the white release paper on each strip to expose the adhesive.
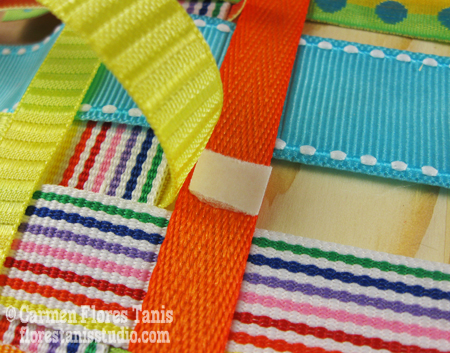
2. Cut a piece of ribbon 4” longer than the width of the mirror and attach it to the exposed strip of adhesive at the top edge, leaving 2” overhanging on either side. Press down firmly. Do the same for the bottom edge.
3. Next, apply a ribbon to each of the two, inside horizontal edges next to the glass mirror, making sure that each of the two ribbons lines up with the wood edges and does not overhang into the mirrored area. This will be extremely helpful later when you have to cut the ribbon center out. Press down firmly on the left side to adhere the ribbons well, but only press very gently onto the center and right exposed adhesive strips. This will give the center and right ends of the ribbons a temporary hold.
4. Working from top to bottom, continue to cut and adhere ribbons across the entire face of the wood frame. Press the ribbons firmly onto the exposed adhesive strips down the left side and very gently on the right side adhesive strips for a temporary hold.
5. Once the entire front of the frame is covered with ribbons, apply more Kool Tak™ Strips along the top, left and bottom outside edges of the frame on top of the ribbons. Do not apply any adhesive strips to the inside center or right outside edges – this will help you with your weaving.
6. Starting from the second ribbon from the top (which is only attached to the wood frame on either end), use the pencil to draw an “X” on every other ribbon end down the right side of the frame. Write on the overhanging excess ends (you’ll cut these extra ends off at the end). Then use the pencil to outline the inner edges of the now-covered center opening. This will help with the center vertical ribbon placement.
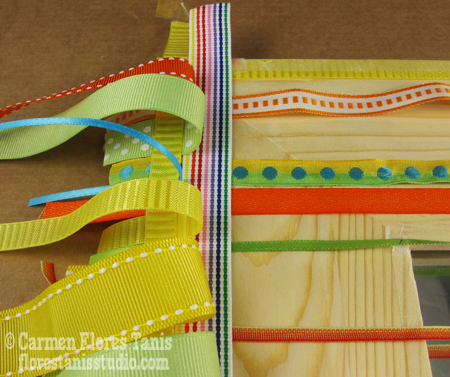
7. Now we’ll start weaving vertically adding ribbons from top to bottom. Attach the first ribbon down the left side of the frame pressing firmly onto the exposed adhesive strip on top of all the horizontal ribbons. This is ribbon “Vertical One.”
8. Gently lift the right ends of all the “X” marked horizontal ribbons from the adhesive and then fold them over to the left side of the frame leaving the unmarked horizontal ribbons in place. As you fold to the left, gently lift and fold over the ribbons which are adhered to the center opening adhesive as well.
9.Take a ribbon and place it next to ribbon “Vertical One”, so that it lies under the folded back horizontal “X” marked ribbons and over the unmarked horizontal ribbons. Press down firmly at the top and bottom to attach the vertical ribbon to the exposed adhesive. This is now ribbon “Vertical Two”.
10. Fold the “X” marked horizontal ribbons back to the right side and tack them down gently onto the adhesive along the right side. Then fold the unmarked horizontal ribbons to the left side of the frame. As in step #9, take a ribbon and place it next to ribbon “Vertical Two”. Press down firmly at the top and bottom to adhere the vertical ribbon to the exposed adhesive.
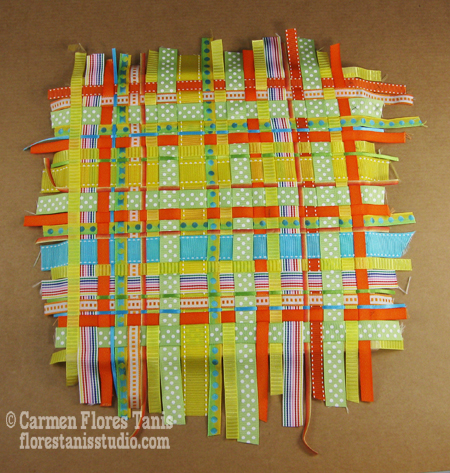
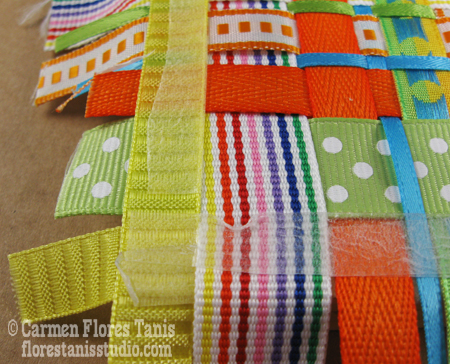
11. Continue weaving across the frame alternating folding back the “X” marked horizontal ribbons and the unmarked horizontal ribbons. Use the exposed adhesive down the right side of the frame to help you keep the horizontal ribbons straight.
12. Every once in a while, tear off a tiny piece of a Kool Tak™ Strip and place it in between the ribbons to help hold everything together.
13. When you approach the center opening which is outlined by the pencil, try to choose a ribbon width that will line up with the center left edge without overhanging into the glass area. Then continue weaving like normal across the opening until you get to the right edge of the center opening and again choose a ribbon width that will line up with that edge. This will help at the end when you cut out the center ribbons to expose the mirror.
14. When you’ve finished weaving across the frame, you can carefully adjust any loose ribbon by gently holding one end down and pulling the opposite end to tighten and straighten it out.
15. Once you are happy with the weave, again place Kool Tak™ Strips on top of the ribbons all along the outside and inside perimeter. Press down firmly before you peel off the white release papers.
16. Use the scissors to snip off the excess ends of each ribbon closely to the wood frame. Carefully cut out the center ribbons to reveal the mirror underneath.

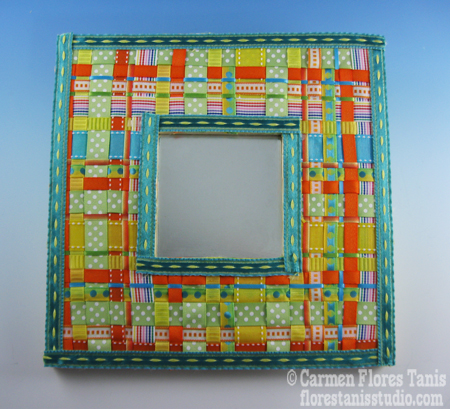
17. Finish off by adding a top ribbon all along the inside and outside edges, pressing firmly onto the exposed adhesive strips. Then hang your new mirror on the wall and enjoy!
**Extra bonus tips:
- You can save lots of time by using wider ribbons!
- As you work, if there are any spots where the adhesive has rubbed off or become less tacky, tear off a piece of a Kool Tak™ Strip and add it to the missing areas.
- Instead of a mirror frame, try using a wood picture frame and add a favorite photo to the center.
- Try other ribbon color combinations or use printed holiday ribbons for different looks.
- If you find that you’ve run out of a particular size of Kool Tak™ Strips, you can use a large pair of scissors to cut a pad of wider strips into thinner ones. Now that is bonus!
What types of handmade spring crafts do you like to make? Leave a comment and share your ideas.